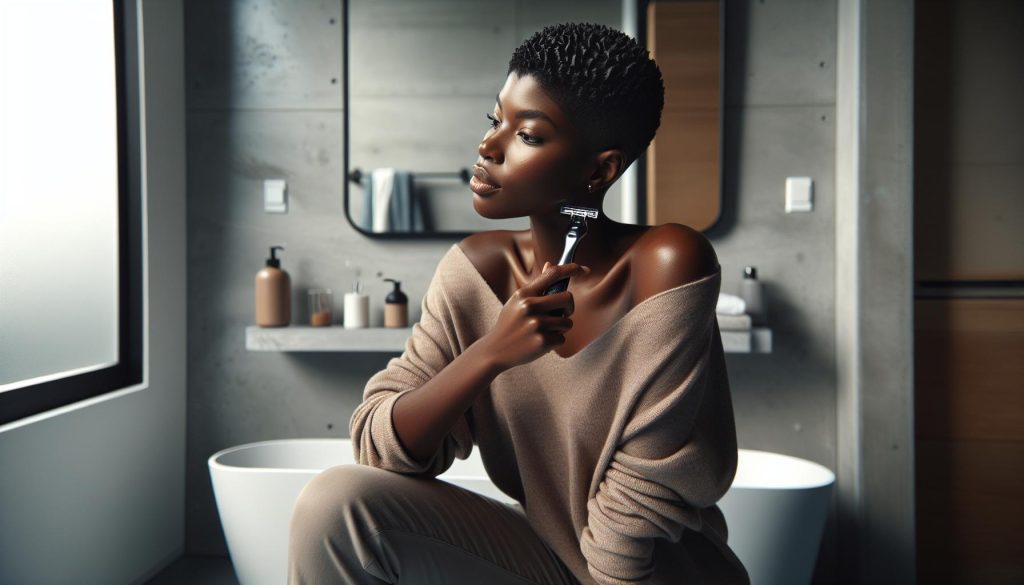
Have you ever admired a perfectly textured hairstyle and wished you could achieve that salon look at home? Razor cutting is a professional technique that can elevate your hair game, adding dimension and movement without the bulk. This guide will walk you through the steps to master razor cutting, empowering you to create stunning, soft layers easily. Whether you’re dealing with thick, unruly locks or fine strands in need of body, learning this technique can help you manage your hair better while enhancing your natural beauty. With a few essential tools and some practice, you’ll discover how to give yourself a fresh haircut that feels polished and stylish, saving you time and money on salon visits. Get ready to take your hairstyling skills to the next level!
Choosing the Right Razor for Texturing Hair at Home
Choosing the right razor is a crucial step in achieving beautiful, textured cuts at home. The type of razor you select can greatly influence both the process and the results. In general, there are two main types of razors used for texturing hair: straight razors and safety razors.
Straight razors, also known as shaving razors, offer precision and control, making them ideal for creating soft, blended textures. They can be used to slice through the hair at an angle, allowing for varied lengths and creating that coveted feathery finish. When choosing a straight razor, consider one with a comfort grip and a replaceable blade system, as this can enhance your handling and ensure a sharper cut. Many straight razors have a wider blade which is beneficial for longer hair.
On the other hand, safety razors can also be effective for texturing, particularly for those who may be new to razor cutting. They are generally easier to handle and come with built-in guards to minimize the risk of cuts. When selecting a safety razor, look for one with a flexible head and adjustable settings, which can cater to different hair types and desired textures.
Regardless of the type, it’s essential to ensure your razor is well-maintained. A dull blade can lead to uneven cuts and damage the hair cuticles, resulting in more split ends. Regularly replace the blades and consider using a honing strap or sharpening stone to maintain the edge. Remember, selecting the right razor not only enhances your cutting experience but also sets the foundation for achieving stunning, professional-looking textures at home.
Essential Tools for a Successful Razor Cut
To achieve the perfect razor cut at home, having the right tools at your fingertips is essential. The process isn’t just about picking up a razor; it’s about creating a space where you can work efficiently and comfortably. Think of your workspace as a mini-salon setting-organization and quality tools will significantly impact your results.
Start with a quality razor. Whether you choose a straight razor for precision or a safety razor for ease, opt for one with a comfortable grip and sharp blades. Dull blades can lead to frustration and uneven cuts, so investing in high-quality blades makes a difference. Keep a honing strap or sharpening stone handy to maintain the edge between uses.
You’ll also need a good pair of hair clippers for prep work, especially for longer hair or bulk removal before texturing. Clippers can help you achieve a base that allows the razor to do its magic without overwhelming it. Pair your clippers with combs of various sizes; these assist in sectioning the hair and provide better control during your cutting process.
Lastly, a fine-tooth comb, hair clips, and a spray bottle with water are indispensable. A fine-tooth comb helps you lift sections of hair for more precise cuts, while hair clips keep remaining sections secure and out of the way. Keeping your hair slightly damp with water not only makes it easier to work with but also protects your hair from potential damage during cutting. By assembling these essential tools, you’re setting yourself up for success in your hair texturing journey.
Step-by-Step Guide to Razor Cutting Techniques
The journey to mastering razor cutting begins with a clear understanding of the techniques involved. Razor cutting isn’t just about using a razor; it’s an art that can completely transform your hairstyle and texture. Below are the essential steps to perform razor cutting effectively at home.
Start by sectioning your hair. This step is crucial to ensure that every part of your hair gets the attention it deserves. Use hair clips to divide your hair into manageable sections, typically four or six, depending on your hair’s thickness. Begin working with the back sections first and gradually move to the sides and top, ensuring that you’re not overwhelmed by the amount of hair you’re working with at once.
Once your hair is sectioned, it’s time to wet your hair lightly. Having your hair damp will make it more manageable and reduce the risk of damage. Using a spray bottle, mist your hair until it’s slightly damp but not soaking wet. This approach keeps the hair pliable, allowing for smoother cuts and a more controlled application of the razor.
Now, select a small section of hair-about an inch in width-and hold it taut between your fingers. When you’re ready, take your razor and angle it at about a 30-degree angle to the hair. Instead of slicing directly through the hair, use a technique called “slide cutting.” With this method, gently glide the razor down the hair shaft rather than pressing down hard. This will create softer layers and a textured finish, which is ideal for achieving a natural look.
As you work through each section, remember to check for balance and evenness. After cutting a few sections, lift the overall hair and assess your progress. Making adjustments and ensuring symmetry is vital to achieving a polished look. Continue the process until you’ve textured all desired areas.
To finish, style your hair to see the full effect of your razor cut. Product application can enhance the layers and texture. For instance, a light mousse or a texturizing spray can add volume and definition, making your cut pop. Don’t forget to also check your ends; if they feel too blunt, you can go back with the razor to soften them.
Practicing these steps will not only boost your confidence but also help you achieve beautiful, professional-looking results right at home. As you gain experience, you’ll find your rhythm and preferred techniques, making the entire process smoother and more enjoyable. Remember, every haircut is unique, so let your creativity flow and enjoy your new skill!
Creating Different Hair Textures with a Razor
Creating texture in your hair using a razor can open up a world of possibilities for achieving stunning styles and personalized looks. Razor cutting not only removes bulk but also enhances movement and dimension, giving your hair a fresh, lively feel. Here’s how you can master the art of texturing your hair with a razor and achieve salon-quality results at home.
Start by understanding the type of texture you want to create. Do you prefer soft, romantic layers or edgier, choppy ends? The way you hold the razor and the angle at which you cut will significantly affect the outcome. For softer layers, consider utilizing a light touch, angling the razor around 45 degrees and sweeping through the ends gently. In contrast, if you aim for more distinct, defined texture, a more vertical approach can infuse your cut with a bolder, choppier look.
When it comes to varying textures, here are a few techniques to try:
- Slide Cutting: This method involves gently gliding the razor down the hair shaft, allowing for a softer finish. It works wonders on long hair, helping to eliminate bulk while creating a seamless blend of layers.
- Point Cutting: By holding the razor vertically and ‘pointing’ it into the ends of the hair, you create a softer, wispy texture that’s perfect for blending layers in medium to short cuts.
- Chopping: For a more dramatic effect, you can use short, quick strokes with the razor to create layers that have a more pronounced, edgy look-ideal for styles that require more definition.
Don’t forget about hair type in your cutting process! For fine or thin hair, razor cutting can enhance volume and movement without adding weight. Meanwhile, for thicker hair, using a razor can help remove bulk while still allowing for shape and style. Pay attention to how your hair responds as you cut; sometimes, a style may require adjusting your technique to better suit the hair’s unique texture and thickness.
Lastly, maintain the health of your hair by always using a sharp razor. Dull blades can cause split ends and damage the hair shaft, which contradicts the goal of a polished style. Regularly clean your razor and replace the blade as needed. This small step can transform your cutting experience, ensuring smooth results every time.
By experimenting with these techniques, you’ll not only enhance your skills but also discover which methods resonate with your personal style, allowing you to create a wide range of stunning textures tailored just for you.
Common Mistakes to Avoid When Razor Cutting
When diving into the world of razor cutting, it’s easy to make mistakes that can lead to frustration and unflattering results. One of the most common pitfalls is using a dull blade. A sharp razor is essential not only for achieving clean cuts but also for preventing damage and split ends. Dull blades can tug at the hair rather than slicing through it smoothly, which may leave your hair looking frayed and unhealthy.
Another frequent error is cutting too much hair at once. While it might seem efficient to try to cut larger sections, working with smaller, manageable sections allows for greater precision and control. This technique minimizes the risk of accidentally removing more length than intended and helps maintain an even texture throughout.
It’s also important to avoid the temptation of cutting in a straight line, which can create a blunt look that lacks movement. Instead, focus on varying your angles and cutting techniques, like point cutting or slide cutting, to achieve that desired softness and texture. Additionally, be mindful of your cutting posture. Working too close to a mirror, for example, can lead to awkward angles and an imprecise cut. Instead, maintain a comfortable distance that allows you to see your hair as it naturally falls.
Lastly, don’t forget the importance of proper hair preparation. Cutting dry hair can lead to unexpected results since hair behaves differently when wet compared to when it’s dry. Always consider wetting the hair or working with damp strands, which allows for better control and a more accurate cutting experience. By avoiding these common mistakes, you’ll be better equipped to create stunning, professional-looking razor cuts right at home.
Razor Cutting Techniques for Different Hair Types
When it comes to razor cutting, different hair types require tailored techniques to achieve the best results. Whether your hair is thick, fine, curly, or straight, understanding how to adapt your approach will enhance your cutting experience and overall outcome. Here’s a breakdown of how to effectively use a razor on various hair textures.
For thicker hair, the key is to start with wet strands to reduce resistance and make slicing easier. When using the razor, employ a slide cutting technique. Begin by sectioning your hair into manageable parts and hold the hair taut. Glide the razor along the hair section gently to create texture without removing too much bulk. This method not only softens the edges but also adds movement, making thick hair feel lighter and more manageable.
Fine hair, on the other hand, can be tricky as it is more susceptible to damage. For this type, consider using a point cutting technique, where the razor is held vertically. This helps to create soft layers without adding too much weight. Divide the hair into small sections and lightly point the razor towards the ends rather than cutting straight across. This will enhance volume and texture without risking fraying or breakage.
Curly hair presents its own challenges. Always cut curls when they are dry for the most accurate results, as wet curls can spring up as they dry, altering the length. Utilize a texturizing technique, taking small sections and using the razor to remove bulk at the mids and ends, rather than cutting at the root. This allows curls to maintain their shape and bounce while still offering definition.
Lastly, for straight hair, a combination of techniques can be effective. Consider both slide and point cutting to introduce dimension. Start with the slide cutting method for your initial shape, then go back with point cutting at the ends to texture them. This combination will bring life to straight locks while ensuring the style remains polished.
By customizing your razor techniques based on hair type, you can achieve salon-quality results from the comfort of your own home. Remember to be patient and practice; each hair type has its nuances, and getting accustomed to the right method will result in beautifully textured hair.
Maintaining Your Razor for Optimal Performance
Keeping your razor in top condition is essential for achieving those clean lines and beautiful textures when cutting hair. A well-maintained razor not only makes the cutting process smoother but also extends the life of your tools, giving you consistent results every time. Here are some straightforward tips to ensure your razor remains sharp and effective.
First and foremost, always clean your razor after each use. Hair clippings, product residue, and moisture can dull the blade and lead to bacterial growth. Rinse your razor under warm water to remove hair and soap. For a deeper clean, you can use a soft brush, like an old toothbrush, to gently scrub the blade and remove any buildup. Just be sure to wipe it down with a clean towel or let it air dry completely to prevent rust.
Another important aspect of maintenance is regularly checking and replacing the blades. Even the best razors will require new blades over time to maintain performance. If you notice the blade pulling or tugging at the hair, or if you’re not getting that clean cut you’re used to, it’s time for a change. Most professional-grade razors have replaceable blades, so be sure to keep a pack handy. As a rule of thumb, consider changing the blade after about 5 to 10 cuts, depending on how thick or coarse the hair is.
Additionally, oiling the blades can help them glide more smoothly through hair and prevent rust. A few drops of mineral oil or a specialized razor blade oil will do the trick. Apply it to the blade after cleaning and drying, and then wipe off any excess. This simple step will keep your razor performing well and ensure you achieve those precise texturing effects.
Lastly, store your razor properly. Avoid tossing it in a drawer where it might get knocked around. Instead, consider a protective case or a designated spot that keeps it safe from accidental damage. Proper storage not only protects the blade but also ensures that your razor remains hygienic and ready for use when you need it.
By following these maintenance practices, you’ll not only extend the life of your razor but also improve your cutting techniques, paving the way for fabulous hair results from the comfort of your home.
How to Style After a Razor Cut
After achieving a sleek razor cut, styling your hair effectively can elevate your new look and showcase your personalized texture. It’s exciting to see how a great cut can be complemented by the right styling techniques. Here’s how to make the most of your razor cut and create a stunning finish.
Start by using products that enhance your hair’s natural texture. Mousse is a fantastic option; apply a golf-ball-sized amount evenly through damp hair to add volume and hold. For finer hair types, consider a light sea salt spray to create that effortless, tousled appearance. Wax or pomade can be beneficial for adding definition and control in shorter styles-just remember, a little goes a long way. Distribute a small amount between your fingers and apply it to the ends of your hair, which will help accentuate those textural layers created by your razor cut.
Blow Dry for Volume
A good blow dry can make all the difference. Use a round brush while directing heat from a blow dryer at the roots, lifting them upward. This technique not only contributes to volume but also helps smooth any flyaways. If you have wavy or curly hair, using a diffuser attachment can enhance natural waves while reducing frizz. Play with your parting-try shifting to one side or parting down the middle to see what complements your facial features best.
Finishing Touches
To lock your style in place, consider a light hairspray or finishing product to keep everything intact without sacrificing movement. Opt for a flexible hold formula if you want to maintain that fresh, effortless vibe. If you prefer an edgier look, tease the roots slightly for added height and texture, but be gentle to avoid damage.
Ultimately, the key to styling after a razor cut is to embrace your hair’s natural characteristics while utilizing the right products to enhance them. Experiment with different techniques and products until you find the perfect balance that complements your style. Taking the time to style properly can help you achieve a look that feels both professional and uniquely yours.
Frequently Asked Questions About Razor Cutting
One of the most exciting aspects of razor cutting hair is the variety of textures and styles you can create at home. But with great potential comes great questions! Here are some common inquiries about razor cutting that can help you make the most of this professional technique.
Many wonder if razor cutting suits all hair types. The good news is that it works effectively on most hair textures, but results can vary. For finer hair, a razor can add softness and movement without weighing the hair down, creating a light, airy look. On the other hand, those with thick or curly hair should use caution; while it can remove bulk and create a fun layered effect, improper technique may lead to frizz. Always start with small sections to gauge how your hair responds.
Another frequent question is about the best tools for razor cutting. While a professional razor is ideal, you don’t need to break the bank. Look for a quality hairdresser’s razor or texturizing razor with a replaceable blade. These are typically easier to handle and control, which is essential for achieving clean cuts. Always ensure blades are sharp; dull blades can snag and damage your hair.
Concerned about maintenance? Keeping your razor in top shape is key to smooth cutting. Rinse the blade after each use and pat it dry to prevent rust. Consider oiling the blade gently every few shaves, which can help maintain its sharpness and prevent hair from sticking to it. Lastly, replace the blade regularly, as a fresh blade will make all the difference in achieving that precise cut without any tugging.
While it may take some practice to master razor cutting, the rewards are abundant. Embrace your uniqueness and try different techniques-experimentation is a vital part of finding your ideal style. Don’t hesitate to reach out for help from friends or online communities if you’re uncertain; there’s a wealth of support available from fellow hair enthusiasts.
In summary, razor cutting can open up a world of styling opportunities when approached with care and knowledge. Armed with the right tools, an understanding of your hair type, and a little patience, you can achieve stunning textures and looks right at home. Happy cutting!
Razor Cutting vs. Scissor Cutting: What’s Best?
When it comes to choosing between razor cutting and scissor cutting, understanding the distinct benefits of each method can significantly influence your hairstyling results at home. Both techniques offer unique advantages tailored to different hair textures and desired outcomes, making it essential to consider what works best for you.
Razor cutting is renowned for its ability to create soft, blended layers and textured finishes. When you use a razor, the cutting edge glides smoothly through the hair, resulting in a wispy, airy effect that can enhance movement and dimension. This technique is particularly effective for finer hair types that benefit from volume and lightness. Additionally, razor cuts can help remove weight from thick hair, allowing for a more manageable style. However, it’s important to wield the razor carefully to avoid frizz or damage, especially with curlier or coarser textures.
On the other hand, scissor cutting provides more precision and control, particularly beneficial for structured styles or blunt cuts. Scissors allow for clean, defined lines and are often the go-to choice for most professional stylists. This method is ideal for achieving a polished look with sharp edges, making it a favorite for those with thicker, straighter hair. If you’re aiming for a classic bob or well-defined layers, scissors might be your best bet.
Both methods can coexist beautifully in your routine, and many experienced hairstylists use them in tandem to achieve a balanced result. To enhance your skills, consider your hair type and the desired finish. If you’re after movement and softness, reach for the razor; if precision and definition are what you seek, grab the scissors. Ultimately, experimenting with both techniques will allow you to discover the perfect combination that suits your style and enhances your natural beauty.
In summary, choosing between razor and scissor cutting is not just about picking a tool; it’s about understanding the effects each can create for your hair type and the look you desire. Embrace the freedom to switch between techniques as your style evolves, and have fun discovering the unique textures and finishes both methods can bring to your hair.
Inspiring Before-and-After Razor Cut Transformations
Transformations achieved through razor cutting can be astonishing, showcasing the dynamic capabilities of this technique. From thick, heavy locks to light, airy styles, the before-and-after results speak volumes about the impact of a skilled razor cut. Many people who have embraced this method find that it’s not just about changing the length, but about completely reinventing their look and feel.
For instance, imagine someone with long, straight hair that appears flat and lifeless. After a razor cut, they could transition to flowing layers that frame the face and add movement, transforming their hair from basic to beautiful. The blend of textures made possible by the razor can elevate a simple look, allowing for versatility in styling. Those who previously thought their hair could only be heavy and dull instead discover a vibrant, bouncy texture that enhances their natural beauty.
Another common scenario involves individuals with naturally curly or coarse hair. A well-executed razor cut can remove excess weight and create a soft, lived-in look, making curls appear more defined and less frizzy. Many find that after their razor cut, their hair not only looks better but feels lighter and more manageable. This refresh can inspire confidence, turning heads and sparking compliments.
As you explore the art of razor cutting at home, consider documenting your own transformations. Before snapping that photo of your fresh cut, take a picture of your starting point. This visual record is not just motivational; it allows you to appreciate your journey and the skills you’ve developed. Celebrate these changes and utilize them to encourage others who might be hesitant about trying razor cuts for themselves. The results can truly change how one perceives their hair-and that is something worth showcasing!
Tips for Getting Professional Results at Home
To achieve professional-looking results at home, it’s critical to approach razor cutting with patience and the right techniques. Unlike traditional scissor cuts, razor cuts require a different mindset-focus on light tension and controlled movement for a seamless and textured finish. Remember, practice makes perfect; your first attempt may not be flawless, but that’s part of the learning process.
Start by preparing your hair. Wet hair is typically easier to work with, as it helps reduce friction and allows for a cleaner cut. Use a high-quality spray bottle to dampen your hair evenly. It’s also advisable to use a sharp, professional-grade razor; dull blades can lead to split ends and uneven textures. When you’re ready to cut, section your hair into manageable parts. Start with the bottom layers and work your way up, which allows for clearer visibility and control over the amount you remove.
Technique is key when creating different textures. One approach is to hold the razor at a 45-degree angle and make quick, feathery strokes rather than dragging the razor through the hair. This method lifts the hair at the roots, promoting volume while maintaining the integrity of the strands. For texturing, consider using point cutting-gently slicing into the ends of the hair with the tip of the razor, which lightens the weight and creates an airy feel.
Lastly, it’s all about the finishing touches. After your cut, be sure to style your hair appropriately to showcase the new texture. Use a lightweight styling cream or mousse to enhance movement without weighing your hair down. Always keep in mind that the final result is not just about the cut itself but how you present that cut afterward. Enjoy the journey of exploring this versatile technique and remember: every cut is a step towards greater confidence and self-expression.
Frequently Asked Questions
Q: What is the best angle to hold a razor when cutting hair?
A: The best angle to hold a razor when cutting hair is typically between 30 to 45 degrees. This angle allows for effective texturing without cutting too harshly into the hair, helping you create soft, blended layers. For more detailed guidance, refer to the “Step-by-Step Guide to Razor Cutting Techniques” in the article.
Q: Can I use a straight razor for texturing hair?
A: Yes, a straight razor can be used for texturing hair, but it requires more skill and control compared to a safety razor. Ensure the blade is sharp and that you practice on a small section of hair before attempting full haircuts. For advice on safety razors, check the “Choosing the Right Razor for Texturing Hair at Home” section.
Q: How do I prevent hair from slipping when razor cutting?
A: To prevent hair from slipping while razor cutting, ensure the hair is damp but not wet. Using a texturizing spray can also provide grip. This will help you maintain control and achieve smoother cuts. More tips can be found under “Common Mistakes to Avoid When Razor Cutting.”
Q: What type of hair is best suited for razor cutting?
A: Razor cutting works best on medium to fine hair types, as thicker hair may not hold the texture as effectively. However, it can also be adapted for wavy or curly hair with the right techniques. Explore the “Razor Cutting Techniques for Different Hair Types” section for tailored advice.
Q: How often should I replace my razor blade for hair cutting?
A: It’s recommended to replace your razor blade after about 5 to 10 haircuts, depending on hair thickness. A dull blade can lead to uneven cuts and split ends. For more maintenance tips, refer to “Maintaining Your Razor for Optimal Performance.”
Q: What should I look for in a razor for at-home hair cutting?
A: When choosing a razor for at-home hair cutting, look for one with a comfortable grip, a replaceable blade system, and a weight that feels good in your hand. A multipurpose razor can also be beneficial. See “Choosing the Right Razor for Texturing Hair at Home” for more information.
Q: How do I clean my razor after cutting hair?
A: To clean your razor after cutting hair, rinse it under warm water to remove hair clippings and product. You can also use a small brush to clean between the blades. Make sure to dry it properly to prevent rust. For optimal upkeep, consult “Maintaining Your Razor for Optimal Performance.”
Q: Can I achieve a professional look with a razor cut at home?
A: Yes, you can achieve a professional look with a razor cut at home by following precise techniques, practicing regularly, and using the right tools. Start with the “Step-by-Step Guide to Razor Cutting Techniques” for solid foundational skills.
Future Outlook
Congratulations on taking the first step towards mastering the art of razor cutting! By applying the professional texturing techniques discussed, you’ll not only elevate your hair-cutting skills but also gain the confidence to achieve salon-quality results right at home. Remember, practice makes perfect, so don’t hesitate to experiment and refine your approach.
If you’re eager to expand your hairstyling repertoire, check out our related guides on “Essential Hair Cutting Tools You Need” and “Quick Tips for Maintaining Your Razor.” With the right tools and knowledge, every cut becomes an opportunity for creativity.
Ready to dive deeper? Sign up for our newsletter for exclusive tips and tricks delivered straight to your inbox. Don’t forget to share your razor cut transformations in the comments below-your experience might just inspire others! Keep exploring, and embrace every chance to enhance your grooming journey.