Replacing a razor blade may seem like a small task, but it’s essential for achieving the closest, smoothest shave and preventing irritation. Did you know that using a dull blade can lead to skin nicks and discomfort? Whether you’re a seasoned pro or just starting out, knowing how to change your razor blade is a crucial skill that can enhance your grooming routine. In this guide, we’ll walk you through simple, clear instructions tailored for every type of razor, ensuring you feel confident and empowered to keep your grooming game strong. Let’s dive in and discover the easy steps to a sharper shave!
Types of Razor Blades: Which One is Right for You?
When it comes to achieving the perfect shave, choosing the right type of razor blade can make all the difference. There are various options, each designed to cater to different needs, skin types, and preferences. Understanding the distinctions can help you navigate the world of shaving with confidence.
Disposable Razors
Disposable razors are convenient and user-friendly, ideal for those new to shaving or on the go. These razors typically come with pre-installed blades that are designed for single use or just a few uses before disposal. They are great for quick touch-ups and travel, but don’t expect the same quality of shave as some of the other options.
Cartridge Razors
Cartridge razors, which often feature multiple blades (typically two to five), allow for a close and smooth shave. The cartridges can be easily swapped out, making them a popular choice for regular shavers. Many also come with lubricating strips that help reduce irritation. If you shave frequently, this might be a versatile option for you.
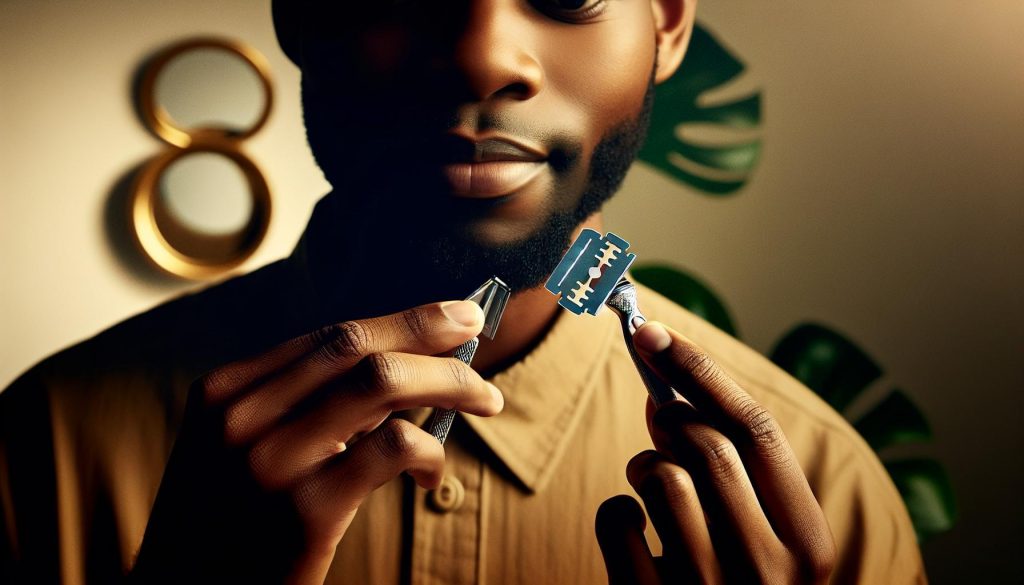
Safety Razors
For those seeking a more traditional approach, safety razors can be appealing. They use a single, double-edged blade, which can provide a more precise shave and is often more environmentally friendly because you only replace the blade, not the entire system. However, they require a bit more technique and care to use effectively, making them best for users who are willing to learn and practice.
Electric Razors
Electric razors offer an alternative that is quick and requires less maintenance compared to traditional razors. They can be used for both wet and dry shaving, depending on the model, and are particularly suitable for sensitive skin. However, they may not provide as close of a shave as their manual counterparts.
Each type of razor blade serves a different purpose and has its pros and cons. To figure out which is right for you, consider your shaving frequency, skin type, and whether you prefer convenience or a closer shave. Remember, testing different options can be a part of your personal grooming journey, helping you find what works best for your individual needs.
Step-by-Step: How to Replace a Razor Blade
Changing a razor blade may seem like a trivial task, but it’s essential for ensuring a comfortable and effective shaving experience. Whether you’re using a cartridge razor, a safety razor, or an electric razor, each type requires a unique approach to blade replacement. By following these simple steps, you can make quick work of this essential grooming routine.
First, gather your supplies. For cartridge razors, you’ll need a new cartridge, while for safety razors, you’ll need a fresh double-edged blade. Electric razors may require a bit more setup, including specific replacement blades or heads, depending on the model. Always check the manufacturer’s instructions for your particular razor.
Once you’re ready, follow these straightforward steps:
Replacing a Cartridge Razor Blade
- Remove the old cartridge: Hold the razor by the handle and press the release button located at the top. This should detach the old cartridge easily.
- Attach the new cartridge: Align the new cartridge with the pivoting head. Press down firmly until you hear a click, signaling that it’s securely attached.
- Dispose of the old cartridge: Many cartridges can be discarded in regular waste. However, if your razor system has a recycling program, consider taking advantage of that.
Replacing a Safety Razor Blade
- Open the razor: Depending on your razor type, you might twist the handle or slide a lever to expose the blade compartment.
- Remove the old blade: Carefully remove the blade-using a blade bank or another safe method to avoid cuts.
- Insert the new blade: Place the new blade gently into the holder, taking care to align it correctly. Close the razor securely to hold the blade in place.
Replacing an Electric Razor Head
- Detach the head: Depending on the design, you may need to twist, pull, or slide the head off.
- Clean the razor: Before inserting a new head or blades, make sure the device is clean and free from hair or debris.
- Install the new head/blade: Following the instructions specific to your model, attach the new head or blades ensuring it clicks firmly into place.
In all cases, remember to wash your hands afterward and dispose of any old blades safely. Store new blades securely in a safe place, out of reach of children, and consider marking the disposal method for used blades, especially if you’re using a safety razor. Regularly replacing your blades keeps irritation at bay and provides a smoother shave, so don’t skip this essential task!
Tools You Need for a Perfect Blade Replacement
When it comes to replacing your razor blades, having the right tools on hand can make all the difference. A smooth blade replacement not only enhances your shaving experience but also reduces the risk of cuts and irritation. Here’s a handy guide on what you’ll need to ensure a perfect blade replacement.
First and foremost, you’ll need your razor. Whether you have a cartridge, safety, or electric razor, make sure it’s in good working order. Replacement blades or cartridges are essential, so have them ready. For cartridge razors, purchase compatible cartridges; for safety razors, opt for high-quality double-edged blades that suit your shaving preference. If you’re using an electric razor, check that you have the specific replacement heads designed for your model.
Another key tool is a blade bank or a safe disposal solution for used razor blades. This is crucial for both safety and environment. Blade banks are specifically designed to hold used blades until you can dispose of them properly. If you’re using a safety razor, handling the blades carefully with a blade bank will help prevent accidental cuts.
Additionally, a cleaning brush or cloth can be handy. After replacing the blade, it’s good practice to clean the razor to remove any hair, soap, or debris that could affect performance. If your razor requires specific maintenance tools, such as a lubricant for electric models, ensure these are also accessible for optimal performance and longevity.
Lastly, ensure you have a mirror in a well-lit area. This might seem basic, but good visibility allows you to see what you’re doing during the replacement process and helps prevent mistakes.
By gathering these tools and taking the time to prepare, you’ll not only streamline the blade replacement process but also enhance your overall shaving experience.
How to Properly Dispose of Old Razor Blades

Disposing of old razor blades might not be the first thing on your mind when you think about your grooming routine, but it’s an essential aspect of maintaining safety and hygiene. Using a proper disposal method ensures that you and those around you are protected from accidental cuts or injuries from thrown-away blades. Here’s how to handle this task responsibly and effectively.
Start by utilizing a dedicated blade bank or sharps container. These containers are designed to safely hold used blades until you can dispose of them properly. If you don’t have a blade bank, you can repurpose an empty can or a heavy-duty cardboard box by securely taping it shut. Ensure that the container is sturdy enough to hold the blades without risk of penetrating through the sides. When the container is full, seal it securely and dispose of it according to your local regulations for hazardous waste. This method not only keeps your environment safe but also minimizes the risk of injury to garbage collectors and others.
If you’re looking for an eco-friendly option, consider recycling your blades. Some recycling programs accept razor blades, especially those made from stainless steel. Check with your local recycling center to see if they have guidelines for recycling or reprocessing used blades. Alternatively, if local services are limited, you can carefully wrap the blades in several layers of newspaper or thick cardboard and tape them securely before placing them in your regular trash to ensure they don’t injure anyone.
Always remember to handle blades with care. Use gloves or a towel when removing them from the razor, and never handle them directly with your fingers. This not only prevents cuts during disposal but also demonstrates good hygiene practices. By taking these steps, you will ensure the safe disposal of your old razor blades, keeping you and your environment safe while helping you feel confident in your grooming routine.
Safety Tips for Changing Razor Blades
Changing razor blades can seem daunting, but with the right precautions, you can ensure a safe and successful blade replacement. Understanding the risks involved, especially when handling sharp objects, is crucial. Each year, there are countless minor injuries reported due to improper handling of razor blades. So let’s empower you with the knowledge you need to change your blades safely.
To begin with, always use protective gloves when handling new or old blades. This simple step creates a barrier against accidental cuts. If you don’t have gloves, consider using a thick towel to grip the blade instead; it can provide enough cushioning while keeping your fingers safe. When removing the blade from your razor, do so slowly and with care. Hold the razor securely, preferably over a surface where you can manage any accidental slips. Ensure you’re well-lit to avoid missteps.
Next, keep your workspace organized and devoid of distractions. This minimizes the risk of accidents, whether it be from dropping a blade or misplacing it. Before you start, gather all necessary tools, such as your replacement blades and a sharps container for disposal. Having everything at hand prevents unnecessary fumbling while you’re engaged in blade replacement.
Finally, always dispose of old blades responsibly. Never throw them loose in the trash, as this poses a risk to waste handlers and others. Instead, use a dedicated blade bank or a sturdy container, as previously mentioned. Wrap the blades in thick paper or cardboard if you are in a pinch. This attention to detail not only keeps you safe but also contributes to a more responsible grooming routine.
Being cautious and prepared will make changing your razor blades a more straightforward task. Feel confident knowing that you’re not just caring for your grooming needs, but also prioritizing safety and hygiene with every fresh blade.
Common Mistakes to Avoid When Replacing Blades
Changing your razor blade can seem simple, but a few common oversights can lead to a frustrating experience or even injury. Many people rush through the process, assuming they know what to do, which can lead to mistakes that compromise both safety and shaving quality. By being aware of these pitfalls, you can streamline your blade replacement routine, ensuring a smooth and effective shave every time.
One frequent mistake is not aligning the new blade properly in the razor head. Each razor type has its specific mechanism for blade placement, and failing to lock the blade in securely can lead to uneven shaving or even injury. Always take a moment to double-check that the blade clicks into place before reassembling your razor.
Another common error is neglecting to clean your razor before replacing the blade. Old hair, skin cells, and shaving cream residue can accumulate and hinder performance. Give your razor a quick rinse under warm water to remove any build-up; this not only promotes better hygiene but also allows for a smoother blade replacement and improved shaving experience.
Many forget the importance of handling blades with care. Even when replacing a blade, it’s easy to inadvertently cut yourself in the process. Use a cloth or gloves for added protection, and always handle blades by their edges, avoiding contact with the cutting side. Another key consideration is not disposing of old blades properly. Always use a designated blade bank or a sturdy container. Tossing them loosely into trash can be hazardous, not just for you but for anyone who might handle the waste later.
Lastly, pay attention to when you should replace your blade. Many individuals will change their blade based on a guess rather than the actual feel of the shave. If you find yourself pulling or experiencing irritation during your shave, it’s a sign that your blade needs replacing. Setting a regular schedule for replacements, combined with paying attention to performance, can ensure you always have a fresh blade at your disposal.
By avoiding these common mistakes, you can master the art of blade replacement, ensuring a safe and effective shaving routine that keeps your skin looking and feeling great.
Identifying When to Replace Your Razor Blade

Recognizing when to replace your razor blade can dramatically enhance your shaving experience. It’s not just about keeping your look sharp; it’s also crucial for your skin’s health and comfort. Using a dull or worn razor blade may lead to irritation, ingrown hairs, and even cuts. Here’s how to tell when it’s time to swap out that blade for a fresh one.
First and foremost, pay attention to how the blade feels during use. If you notice that you’re applying more pressure than usual to get a close shave, or if you’re experiencing pulling and tugging on your hair, it’s a strong indication that the blade has dulled. Ideally, a good blade should glide smoothly over your skin without resistance. You might also notice increased levels of irritation or razor burn, which are signs that the blade’s performance has degraded.
Another practical way to assess blade longevity is to look at how many shaves you’ve completed. While the exact number of uses varies depending on the type of razor, a general rule of thumb is to replace cartridges after 5-10 shaves and replace safety razor blades after about 5-7 uses. However, this timeframe can shift based on your hair type, shaving frequency, and the products you use. For example, if you shave daily or have coarse hair, you’ll likely need to replace your blade more frequently.
Additionally, keep an eye on the lubricating strip, if your razor has one. Once you see that it’s completely worn away, it’s time to replace the blade. A lubricating strip helps reduce friction while shaving and provides moisture, so when it’s gone, you’re at a higher risk for irritation.
In summary, listen to your skin, monitor your shave count, and keep track of the lubricating strip’s condition. By being proactive about blade replacement, you ensure a more comfortable, effective shave while maintaining the health of your skin.
Blade Care: Tips for Longevity and Performance
Caring for your razor blades isn’t just about cleanliness; it’s about enhancing their performance and ensuring a smoother, more comfortable shave. A well-maintained razor blade can make all the difference, extending its lifespan and improving your shaving experience. Regular care and attention not only help to keep the blade sharp but also protect your skin from irritation and other potential issues.
First off, always rinse your razor under warm water after each use. This simple step washes away hair, shaving cream, and skin debris that can cause dullness and clogging. If you notice any buildup, gently brushing the blades with a soft toothbrush can help dislodge particles without damaging the edges. Additionally, consider drying your razor thoroughly after rinsing. Moisture can lead to rust, which not only compromises the blade’s integrity but can also cause skin irritation. Simply patting the blades dry with a clean towel or allowing them to air dry in a well-ventilated area can work wonders.
For safety razor users, disassembling your razor occasionally for deep cleaning is worthwhile. Soaking the components in warm, soapy water loosens grime and helps maintain their appearance and functionality. After a few minutes, scrub the parts with a soft brush to remove any stubborn residues, then rinse thoroughly and dry as mentioned above. It’s also wise to store your razor in a dry part of your bathroom. Avoid keeping it in a damp shower environment where rust can develop quickly.
Lastly, to ensure your blades remain sharp and effective, consider using a few drops of mineral oil after cleaning. This not only helps prevent rusting but also creates a protective layer over the blade, maintaining its sharpness for more shaves. Keep in mind that even the best care can’t replace a dull blade, so monitoring blade performance regularly is essential for achieving the best results.
By incorporating these practices into your grooming routine, you’ll enjoy longer-lasting blades and a much more pleasant shaving experience.
What to Do If Your Razor Is Rusty or Damaged

If you’ve discovered rust on your razor, don’t panic! It’s a common issue that can easily be addressed with a few straightforward steps. Rust not only affects the performance of your razor but can also be a source of skin irritation during shaving. Thankfully, there are effective methods to restore your razor or determine if it’s time for a replacement.
Start by thoroughly assessing the extent of the rust. For minor rust spots, you can often salvage the blade. Soak the rusty area in white vinegar for about 30 minutes to an hour. The acidity in the vinegar helps break down the rust without damaging the metal underneath. After soaking, gently scrub the rusted area with a soft toothbrush or a cloth to remove the rust. Be careful not to apply too much pressure as this can damage the blade’s edge. Rinse the razor under warm water and dry it completely to prevent future rusting.
If your razor is significantly rusted or showing signs of pitting or severe corrosion, it may be best to retire it permanently. Continuing to use a damaged blade poses risks, such as nicks, cuts, and skin infections. When disposing of old razor blades, always wrap them in paper or place them in a designated blade disposal container to ensure safety.
To prevent rust in the future, make it a habit to dry your razor thoroughly after each use and store it in a dry area. Consider applying a few drops of mineral oil to the blades after cleaning; this not only protects against rust but also helps maintain sharpness. Regular maintenance can significantly increase the longevity of your razor and enhance your shaving experience overall.
Understanding Different Razor Systems: Cartridge vs. Safety

Understanding the differences between cartridge and safety razors can significantly influence your shaving experience and blade replacement process. Each system has its unique benefits and considerations, which cater to different preferences and skin types.
Cartridge razors are extremely popular for their convenience. Typically, they feature multiple blades mounted on a plastic head that can be easily replaced with a new cartridge when worn out. This system is ideal for beginners or those who prefer a quick, less involved approach to shaving. Most cartridge razors come equipped with features like pivoting heads and moisture strips, enhancing the glide and minimizing irritation. One of the key advantages is that they often require minimal skill to use effectively-just replace the cartridge when it shows signs of dullness, and you’re good to go.
On the other hand, safety razors offer a more traditional shaving method, using a single double-edge blade that can be replaced easily. While they may demand a bit of technique to avoid nicks and ensure a smooth shave, many find the learning curve worthwhile. The blades are typically more cost-effective than cartridge replacements, making safety razors a popular choice for those looking to save in the long run. Moreover, they can provide a closer shave since the weight of the razor head benefits from a more consistent pressure. Enthusiasts often appreciate the craftsmanship and longevity associated with safety razors, which can last a lifetime with proper care.
When it comes to blade replacement, the process varies slightly between the two. Replacing a cartridge is straightforward-simply click the new cartridge into place. For safety razors, it requires unscrewing the razor head, inserting a fresh blade, and reassembling the unit. Whichever method you choose, understanding these systems can lead to a more informed decision about your shaving routine, ultimately enhancing your overall grooming experience.
In summary, the choice between cartridge and safety razors hinges on your shaving style, budget, and preference for maintenance. Whichever you choose, mastering the replacement process and caring for your razor will lead to smoother, more comfortable shaves.
Troubleshooting: When Your Razor Just Won’t Perform
Experiencing issues with your razor can be frustrating, especially when you’re trying to achieve a smooth shave. When your razor just won’t perform, it often signifies that it’s time for a change or a closer look at your shaving routine. A dull blade can lead to irritation, nicks, and an overall less satisfying shaving experience.
One of the first signs that your razor is underperforming is tugging when you shave. If you feel the blade pulling at your hair rather than cutting smoothly, it’s likely dull. For cartridge razors, a quick solution is to replace the entire cartridge; for safety razors, substituting the blade is necessary. Typically, you should replace razor blades after five to seven uses, depending on hair thickness and shaving frequency. If you’re finding that you need to press harder to achieve the same results, that’s a clear signal for a change.
Consider also the condition and maintenance of your razor. For safety razors, ensure the blade is properly aligned within the head. Misalignment can affect how well the blade grazes your skin, leading to an uneven shave. If you notice that your razor is rusting or degrading-common if not dried properly after use-it’s important to either clean it thoroughly or replace it entirely. Keeping your razor in a dry area can help prevent rust buildup and prolong its life.
Lastly, your shaving technique can impact razor performance. Always shave in the direction of hair growth, as going against it can lead to discomfort and increase the likelihood of cuts. Using quality shaving cream or gel can also enhance the glide of the blade, improving its performance and reducing irritation. Remember, a well-maintained razor, along with the right technique, can significantly elevate your shaving experience, allowing for a more enjoyable and effective grooming routine.
Maintaining Your Razor for Optimal Shaving Experience
Maintaining your razor is essential for achieving a smooth, irritation-free shave every time. A little attention goes a long way in extending the life of your blades and ensuring optimal performance. One of the most crucial practices is to clean your razor properly after each use. Instead of tapping the razor against the sink or wiping it with a towel, simply rinse it under warm running water. This helps remove hair and shaving cream residues that can dull the blades over time edge/comments/136i1yu/howdoyoucleanandmaintainyourrazor/”>[[1]].
If you notice signs of rust or any damage, it’s critical to address them immediately. A rusty blade can not only irritate your skin but can also be unsafe. For small rust spots, soaking the razor in warm water with a few drops of dish soap for a couple of hours can help loosen debris and build-up. After soaking, scrub gently with a soft brush to remove stains [[3]]. Should the rust persist or the blade be substantially damaged, consider replacing it entirely. Regular maintenance will not only enhance the lifespan of your razor but also improve your overall shaving experience, leading to smoother results and less irritation.
In summary, proper care involves thorough cleaning and drying, regular monitoring for rust, and ensuring that blades are correctly aligned. These simple steps can transform your shaving routine from a chore into a pleasant self-care ritual.
Frequently Asked Questions
Q: How often should I replace my razor blade?
A: You should replace your razor blade every 5 to 10 shaves, depending on your hair type and the quality of the blade. Dull blades can cause irritation and cuts, so keep an eye out for signs of wear. For more detailed guidance, check out the “Identifying When to Replace Your Razor Blade” section.
Q: What are the signs that my razor blade needs replacing?
A: Signs that your razor blade needs replacing include tugging or pulling during shaving, visible rust, and a rougher shave compared to a fresh blade. These indicators ensure you maintain a smooth and safe shaving experience. See our section on “Identifying When to Replace Your Razor Blade” for more tips.
Q: Can I replace just one blade in a multi-blade cartridge?
A: Most multi-blade cartridges are designed to be replaced as a unit, and individual blades cannot typically be swapped out. If you notice reduced performance, it’s best to replace the entire cartridge to ensure a close and comfortable shave. Refer to the “Understanding Different Razor Systems” section for more insights.
Q: What should I do if my razor blade causes irritation?
A: If your razor blade causes irritation, first check if the blade is dull and needs replacing. Also, ensure you’re using proper shaving technique and consider using a soothing shaving cream or gel. For additional troubleshooting, see our “Troubleshooting: When Your Razor Just Won’t Perform” section.
Q: Is it safe to use a rusty razor blade?
A: No, using a rusty razor blade is unsafe as it can lead to infections and serious skin irritation. Always dispose of rusty blades properly and replace them with new ones. Check the “How to Properly Dispose of Old Razor Blades” section for safe disposal methods.
Q: What tools do I need to replace a razor blade?
A: To replace a razor blade, you typically need the new blade and the razor handle. Some razors may require an additional tool for easier replacement. Visit our “Tools You Need for a Perfect Blade Replacement” section for more detailed information.
Q: Can I use any blade type with my razor?
A: No, you cannot use any blade type with your razor as they are often designed for specific systems. Always match your razor handle with compatible blades for the best performance. For system comparisons, refer to “Understanding Different Razor Systems: Cartridge vs. Safety.”
Q: How do I safely dispose of razor blades?
A: To safely dispose of razor blades, place them in a designated blade disposal container or a hard, puncture-proof container like an old coffee can. Never throw them directly into the trash to prevent injury. See our “How to Properly Dispose of Old Razor Blades” section for complete guidelines.
In Conclusion
Now that you know how to replace a razor blade effectively, you’re well on your way to maintaining a smoother grooming routine. Don’t let dull blades affect your shaving experience-ensure you make this a regular part of your grooming regime. If you have any lingering questions or need personalized advice, feel free to drop a comment below or check out our guide on “Choosing the Right Razor for Your Skin Type” for more tips tailored to your needs.
Ready to take your grooming skills to the next level? Explore our articles on “The Best Shaving Techniques for a Close Shave” and “Post-Shave Care: How to Avoid Irritation,” to enhance your overall experience. Remember, keeping your razor in top shape is key to achieving that perfect shave! Sign up for our newsletter for more expert tips and tricks-your skin will thank you!