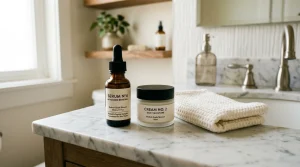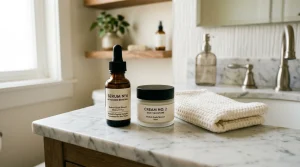
Have you ever considered the power of castor oil in your skincare routine? This versatile oil isn’t just for hair-it’s gaining popularity as a natural oil cleanser. Using castor oil can help dissolve impurities and makeup while nourishing your skin, creating a healthy, radiant complexion. Whether you’re struggling with stubborn makeup or looking for a gentle way to clean your face, learning how to use castor oil as a cleanser could be the solution you need. It’s simple, effective, and you can easily customize it to fit your skin type. Ready to explore how to incorporate this DIY solution into your daily regimen? Let’s dive in!
Can Castor Oil Really Cleansing Oil Work?
Using castor oil as a cleansing oil may initially seem surprising, but its unique properties make it an effective choice for many. Rich in ricinoleic acid, castor oil possesses anti-inflammatory and antibacterial qualities that can help address various skin concerns. When used correctly, it can effectively dissolve makeup and impurities, leaving your skin clean and moisturized rather than stripped of its natural oils.
When applying castor oil, remember that a little goes a long way. Start with a dime-sized amount and gently massage it into damp skin using circular motions for about thirty seconds. This allows the oil to penetrate deeply, breaking down dirt and makeup while promoting circulation. Following this, a warm, damp cloth can be used to wipe away the oil; this acts as a gentle exfoliator while enhancing the cleansing process.
While castor oil might be particularly beneficial for those with oily or combination skin due to its ability to balance oil production, it can also serve those with dry skin types, as it doesn’t dry the skin out. That said, patch testing is crucial, especially for those with sensitive skin, to ensure compatibility. By listening to your skin’s needs and adjusting your routine accordingly, you can unlock the potential benefits of castor oil in your cleansing regimen.
Understanding the Benefits of Oil Cleansing
Oil cleansing might sound counterintuitive, especially if you’re used to foaming cleansers that promise to strip away oils. However, using oils-like castor oil-can help maintain balanced, healthy skin by effectively removing dirt, makeup, and excess sebum without causing dryness. The key lies in understanding how oil cleansing works: oil attracts oil. This means that when you massage castor oil into your skin, it binds to the impurities and excess oils, allowing them to be wiped away easily.
One of the standout benefits of oil cleansing is its ability to hydrate the skin. Traditional cleansers can often lead to a tight feeling due to their stripping properties, especially if you have dry or sensitive skin. In contrast, castor oil is rich in fatty acids, which not only help cleanse but also moisturize the skin. This nourishing effect leaves your skin feeling soft and smooth rather than dried out.
Moreover, castor oil is packed with ricinoleic acid, known for its anti-inflammatory and antibacterial properties. This makes it an excellent option for those prone to breakouts or skin irritation, as it can soothe redness and inflammation while combating acne-causing bacteria. When used as part of your routine, it can help promote a clearer complexion over time.
For those who are curious about incorporating oil cleansing into their skincare regimen, it’s important to remember that everyone’s skin is unique. Initially, you might find that you need to adapt the way you use oils based on your skin’s response. Starting with a gentle approach, using just a small amount of castor oil, will help you gauge how your skin reacts and adjust your routine accordingly.
How to Use Castor Oil in Your Routine
Incorporating castor oil into your skincare routine can be a transformative experience for your skin. The richness of castor oil, combined with its unique properties, makes it an effective choice for oil cleansing. When you start, opt for a natural, cold-pressed castor oil to ensure you’re utilizing the highest quality product.
To use castor oil effectively, begin by preparing your skin. Splash your face with warm water to loosen any dirt and makeup. Use a dime-sized amount of castor oil and apply it to your damp skin with your fingertips. Massage the oil in gentle circular motions for about 30 seconds, focusing on areas prone to congestion or makeup residue. This process not only helps in breaking down impurities but also promotes circulation.
For optimal results, follow your oil application with a warm, damp washcloth. Place it over your face for a minute to allow the steam to open up your pores. Then, gently wipe away the oil, which should lift away dirt and dead skin cells without leaving your skin feeling greasy. This method leverages the oil’s ability to attract oil, yielding a clean and refreshed complexion.
As you familiarize yourself with oil cleansing, remember that patience is key. You may need to adjust the amount of oil or the frequency of use based on how your skin reacts. Some people may thrive with daily use, while others might prefer a couple of times a week. Trust your instincts and give your skin time to adapt to this new routine. Using castor oil as a cleansing agent isn’t just about cleaning; it’s a nurturing ritual that can elevate the overall health of your skin.
Essential Ingredients for a DIY Oil Cleanser
To create a DIY oil cleanser that leverages the cleansing power of castor oil, selecting the right combination of ingredients is essential. Balancing castor oil with other beneficial oils will ensure your cleanser effectively removes impurities while caring for your skin. Castor oil, known for its deep cleansing properties, is thick and may be too heavy for some skin types when used alone; this is where complementary oils come into play.
Begin with a base of Castor Oil as the primary cleansing agent. Its unique fatty acid profile helps dissolve makeup and dirt. To create a balanced formulation, consider adding Jojoba Oil, which closely resembles the natural oils of your skin. It’s lightweight, making it perfect for all skin types and helping to moisturize without clogging pores. Alternatively, Sweet Almond Oil can also be used for its nourishing and softening properties, particularly beneficial for dry skin types.
In addition to these oils, you might want to incorporate a touch of Vitamin E oil. This antioxidant not only acts as a natural preservative but also enhances the nourishing qualities of your blend while helping to keep the skin youthful. For a refreshing twist, consider including a few drops of essential oils like lavender or tea tree oil, which offer additional cleansing benefits and provide delightful aromatherapy as you cleanse.
Suggested DIY Oil Cleanser Recipe
Here’s a simple recipe to get you started:
- Ingredients:
– 2 tablespoons Castor Oil
– 1 tablespoon Jojoba Oil (or Sweet Almond Oil)
– 1 teaspoon Vitamin E oil
– 5-10 drops of essential oil (optional)
- Directions:
– Combine all ingredients in a small bottle or jar.
– Shake well to mix before each use.
This blend creates a versatile cleanser that rid your skin of impurities while keeping it hydrated and glowing. Remember, the key to a successful routine is to adapt the ratios based on your skin’s needs. Start with this basic recipe, and feel free to experiment with different oils as you learn how your skin responds. Enjoy the nourishing ritual of oil cleansing, discovering what ingredients make your skin feel its absolute best.
Step-by-Step Guide to Making Your Own Castor Oil Cleanser
Creating your own castor oil cleanser at home is not only simple but incredibly satisfying. This versatile ingredient is celebrated for its deep cleansing properties, helping to effectively dissolve makeup and remove impurities from the skin. By combining it with complementary oils, you can customize the formula to best suit your skin type. Here’s a straightforward guide to making your own oil cleanser with castor oil.
Start by gathering your ingredients. You’ll need:
- 2 tablespoons of castor oil – This will be the primary cleansing agent.
- 1 tablespoon of a lighter oil (like jojoba or sweet almond oil) – This will balance the heavy texture of castor oil, making it easier for your skin to absorb.
- 1 teaspoon of vitamin E oil – This acts as an antioxidant and natural preservative.
- 5-10 drops of essential oil (optional) – Choose something soothing like lavender or purifying like tea tree oil, depending on your preference.
Once you have everything ready, it’s time to mix. In a small bottle or jar, combine all your oils. Shake it well to mix the ingredients thoroughly. It’s best to make a fresh batch regularly to ensure potency, especially when including essential oils, as they can lose their effectiveness over time.
When you’re ready to use your DIY cleanser, apply a dime-sized amount to clean, damp skin. Use gentle, circular motions to massage it into your face for about thirty seconds. This step helps to break down dirt, makeup, and excess oil. Follow with a warm, damp cloth to wipe away the oil, revealing clean and hydrated skin beneath. Finally, rinse with cool water to close your pores.
Remember, the beauty of this homemade cleanser lies in its versatility. Don’t hesitate to adjust the oil ratios based on how your skin reacts. If your skin feels too oily, consider using less castor oil and more of the lighter oil. With this step-by-step guide, you can enjoy the cleansing benefits of castor oil tailored to your unique skincare needs!
Best Practices for Oil Cleansing Application
When it comes to oil cleansing, the key to success lies in how you apply the product. The right technique can enhance the effectiveness of your DIY castor oil cleanser, ensuring that you not only remove dirt and makeup but also nourish your skin. To make the most of your oil cleansing routine, consider these best practices.
Start with clean, damp skin for optimum absorption. Apply a dime-sized amount of your castor oil cleanser directly onto your face; this allows the oil to better dissolve impurities. Use your fingertips to gently massage the oil into your skin in circular motions for about 30 seconds. This motion helps to break down makeup and sebum, allowing the oils to penetrate the skin and work their magic. It’s a relaxing ritual that can also stimulate blood flow, giving your complexion a healthy glow.
After massaging, grab a warm, damp cloth. Place it over your face, allowing the warmth to help open your pores further. This step not only enhances cleansing but also preps your skin for the next step-removing all the oil and impurities. Gently wipe away the cleanser using the cloth, ensuring that you get into every nook and cranny without tugging or pulling at the skin. Finish this process by rinsing your face with cool water to close the pores, sealing in the benefits of the oils you’ve just applied.
For those who find castor oil tends to leave their skin feeling too heavy, remember that customization is key. Adjust the oil ratios in your DIY formulation as needed; you might find that increasing the amount of a lighter oil can help delicate or oily skin types feel less greasy afterward. Always listen to your skin; developing an effective routine is often about trial and error.
By approaching your oil cleansing routine with care and intention, you can unlock the full potential of castor oil as a gentle but powerful cleanser. This thoughtful application not only leads to cleaner skin but also transforms your cleansing ritual into a soothing experience you can look forward to each day.
Tips for Different Skin Types and Concerns
When it comes to using castor oil as a cleansing method, understanding your skin type is essential for maximizing the benefits while avoiding potential drawbacks. Castor oil is a thick, rich oil, which can be both advantageous and challenging depending on your unique skin concerns. Let’s explore how to tailor your oil-cleansing routine to fit your specific needs.
For those with oily or acne-prone skin, incorporating a lighter oil in your castor oil mixture can be beneficial. Consider blending castor oil with more fluid oils like sweet almond or jojoba oil. This combination maintains the cleansing power of castor oil while preventing that heavy feeling. Start with a ratio of 1:1 for oily skin, and see how your skin reacts; you can adjust the proportions based on how your skin feels after using the cleanser. Make sure to really focus on areas where you tend to have breakouts, as the cleansing properties of castor oil can help dissolve excess sebum while preventing clogged pores.
If you have dry or sensitive skin, you might want to ease up on the amount of castor oil you use, as it can be quite penetrating and, for some, potentially irritating. Opt for a mix of three parts a gentler oil like avocado or sunflower oil with one part castor oil. This helps to ensure you reap the benefits of oil cleansing-like hydration and nourishment-without stripping your skin of its essential moisture. Always perform a patch test first, especially if you’re trying castor oil for the first time, to see how your skin reacts before applying it to your entire face.
For those with combination skin, where certain areas may be oily while others are dry, creating a customized blend is key. You can consider using castor oil selectively, applying it to oilier areas while using a more hydrating oil on the drier zones. Experiment to find the perfect balance that works for you.
Moreover, age and environmental factors can influence how your skin reacts to cleansing oils. If you’re in a particularly dry climate or are experiencing changes in your skin due to age, listen to your skin’s signals and adjust the amount or type of oils accordingly. For extra care, consider incorporating nourishing additives such as vitamin E or essential oils like lavender or chamomile, which can calm the skin and provide additional skin benefits.
In summary, the key to a successful oil-cleansing routine using castor oil lies in understanding and respecting your skin’s unique needs. Start with trial and error, and be patient as you find the blend that feels just right for you. Each skin type calls for different approaches, so don’t hesitate to get creative and customize your oil cleansing experience!
Common Mistakes to Avoid with Oil Cleansing
Using oils for cleansing can be a game-changer, but there are common pitfalls that can diminish your experience. Understanding these mistakes can save you time and help you achieve the beautiful skin you’re aiming for.
One frequent error is not customizing your oil blend. Each skin type has unique needs, and using castor oil alone might not cater to yours effectively. Instead of applying pure castor oil, consider blending it with lighter oils such as jojoba or sweet almond oil if you have oily skin, or with gentler options like avocado oil if your skin tends to be dry. This custom approach not only enhances the benefits but also prevents possible irritation or heaviness.
Another mistake is neglecting to perform a patch test before fully incorporating castor oil into your routine. Skin types vary significantly, and what works wonderfully for one person can cause reactions for another. By applying a small amount of your oil mixture on a less visible area for a couple of days, you can gauge your skin’s tolerance and avoid potential discomfort.
Overusing oil is another common misstep. Some might think that more oil equals better cleaning, but that can lead to clogged pores and breakouts. A quarter-sized amount is typically sufficient for your entire face. Remember, the goal is to dissolve the grime and makeup, not douse your skin. Gently massaging the oil into your skin for around 30 seconds should be enough to reap its benefits.
Finally, be mindful of the removal process. Rinsing with hot water can be tempting, but using lukewarm water is more effective in ensuring that your skin retains moisture. Follow up with a soft cloth to gently wipe away excess oil, ensuring your skin feels clean but not stripped of its natural moisture.
By avoiding these common missteps and tailoring your approach to the unique needs of your skin, you can enjoy all the nourishing benefits that castor oil offers while achieving a healthy, radiant complexion.
How Castor Oil Compares to Other Cleansing Oils
Using castor oil as a cleanser can be an exciting alternative for those seeking a natural approach to skincare. However, it’s essential to understand how it stacks up against other popular cleansing oils.
One significant aspect of castor oil is its thick consistency and unique properties. While many cleansing oils, like argan or jojoba oil, offer a lightweight feel, castor oil is more viscous and can feel heavier on the skin. This density allows castor oil to be exceptionally effective at breaking down makeup and impurities, drawing out dirt from pores. However, because of its strength, it’s often best suited for those with oily or combination skin, while individuals with dry or sensitive skin may prefer lighter options that won’t strip their natural oils.
Comparing Castor Oil with Other Cleansing Oils
There are several popular cleansing oils on the market, each offering various benefits:
- Jojoba Oil: Similar to the skin’s natural sebum, jojoba oil is lightweight and non-comedogenic, making it a fantastic choice for sensitive and acne-prone skin. Its ability to mimic skin oil helps to balance hydration without leaving a heavy residue.
- Argan Oil: Known for its rich fatty acid content, argan oil provides excellent moisturizing benefits while cleansing. It’s particularly beneficial for dry skin as it nourishes and hydrates, leaving the skin soft without that thick feeling.
- Olive Oil: A staple in many kitchens, olive oil works well as a cleanser due to its emulsifying properties. It’s great for removing stubborn makeup and is suitable for all skin types but can be too heavy for some.
When considering which oil to use, think about your specific skin type and concerns. For those who struggle with acne or congested pores, blending castor oil with a lighter oil like jojoba can strike the perfect balance, leveraging the cleansing power of castor while maintaining nourishment. Ultimately, the choice between castor oil and other cleansing oils comes down to personal preference and skin needs. Experimenting with different combinations can yield the best results for achieving a clear, radiant complexion.
Real User Experiences: Success Stories and Tips
Transitioning to castor oil as an oil cleanser can be a refreshing journey for your skincare routine, and many users have shared their positive experiences. One common theme among success stories is the oil’s ability to thoroughly cleanse without stripping the skin. Users often report that, after using castor oil, their skin feels softer, more hydrated, and remarkably free of impurities. Many have also noted that it effectively removes even the most stubborn makeup, making it a go-to for evening skincare rituals.
For instance, one user shared that incorporating castor oil into her routine helped combat her combination skin issues. By mixing it with a lighter oil, like jojoba, she created a balanced blend that provided deep cleansing while keeping her skin hydrated. She recommends applying a quarter-sized amount to damp skin and massaging it in with gentle pressure for about a minute, which helped boost circulation and relaxation. After rinsing with warm water, she felt her pores were visibly clearer and her skin less oily.
Another user’s journey highlights how castor oil can also help with acne-prone skin. By using it twice a week as part of her cleansing routine, she noticed a significant reduction in breakouts. “It was like a reset button for my skin,” she remarked. She emphasized the importance of following up with a light moisturizer, reminding others that keeping the skin hydrated post-cleanse is essential, especially when using heavier oils.
Users have also shared tips on application techniques. Several recommend pairing castor oil with essential oils, like tea tree or lavender, to enhance its benefits. A few drops mixed in can boost antibacterial properties, making the cleanser even more effective for acne treatment. The consensus is that patience is key; give your skin time to adjust, and be consistent with your routine for the best results.
In summary, real users’ experiences with castor oil as a cleanser reveal its potential to address various skin concerns while maintaining the skin’s moisture balance. By experimenting with different combinations and application techniques, and understanding your specific skin needs, you can unlock the full potential of this versatile oil in your skincare regimen.
Maintenance and Storage of Your DIY Oil Cleanser
When it comes to maintaining the freshness and efficacy of your DIY oil cleanser, proper storage and care are key. Castor oil, while robust, can degrade over time if not stored correctly. To ensure your homemade cleanser remains effective for as long as possible, always choose airtight containers made of dark glass or opaque plastic. This helps protect the oil from light exposure, which can lead to oxidation and decrease its quality.
For optimal results, store your oil cleanser in a cool, dry place, away from heat sources like stoves or direct sunlight. A cabinet or drawer in your bathroom is usually ideal. It’s also wise to label your container with the date you made the cleanser and the types of oils included. Most DIY oil cleansers can last around 3 to 6 months if stored properly, but your senses are your best guide. If you notice any off smells or changes in color, it’s best to discard the mixture.
When it’s time to use your cleanser, give it a good shake if you’ve combined multiple oils. This ensures an even distribution of ingredients, maximizing the benefits during application. As you incorporate this oil cleanser into your routine, you might find it helpful to keep the container nearby as a reminder to practice self-care consistently. And remember, while oil cleansing can be incredibly nourishing, be attentive to changes in your skin’s needs that may arise with seasonal changes or shifts in your routine.
By following these simple maintenance tips, you can keep your DIY oil cleanser fresh and effective, enhancing your cleansing routine while providing your skin with the care it deserves.
Expert Tips for Maximizing Your Cleanser’s Benefits
If you’re looking to enhance the benefits of your castor oil cleanser, you’ll be pleased to know there are several expert tips that can help you achieve glowing, healthy skin. One of the most effective strategies is to apply your cleanser on slightly damp skin. This helps to increase absorption and allows the oils to glide over your face more easily, ensuring a more thorough cleanse. Aim to massage the oil in gently using circular motions for about 30 seconds; this not only stimulates circulation but also enables the oil to break down makeup and impurities effectively.
For optimal results, consider blending castor oil with other oils that complement its properties. For instance, jojoba oil mimics the skin’s natural sebum, making it a fantastic partner for oil cleansing. A typical ratio could be one part castor oil to two parts jojoba oil. This combination can help with the balance: castor oil is excellent for deep cleaning, while jojoba oil ensures adequate hydration, reducing the risk of over-drying.
Another key tip is to use a warm washcloth for removal. After massaging the oil into your skin, soak a washcloth in warm water, wring it out, and place it over your face for 15-30 seconds. This steam helps to open your pores and allows the oils to penetrate deeper. Gently wipe away the oil with the cloth, repeating the process as needed until your skin feels clean. This technique not only enhances the cleansing effect but also offers a wonderful spa-like experience at home.
Don’t forget the importance of patch testing any new combinations, especially if you have sensitive skin. It’s always a good idea to apply a small amount to a discreet area and wait 24 hours to ensure you have no adverse reactions. By following these simple yet effective practices, you can maximize the benefits of your castor oil cleanser, leaving your skin refreshed, nourished, and glowing.
Faq
Q: Can I use castor oil for all skin types as an oil cleanser?
A: Yes, castor oil can be used for various skin types, but its thick consistency may not suit everyone. It’s best for oily or acne-prone skin due to its ability to dissolve impurities. However, if you have dry or sensitive skin, consider mixing it with lighter oils like jojoba or sweet almond to balance its effects.
Q: How often can I use castor oil as a cleanser?
A: You can use castor oil as a cleanser 2-3 times a week, depending on your skin type. Oily skin may benefit from more frequent use, while dry or sensitive skin should use it less often to prevent irritation. Always adjust according to your skin’s response.
Q: What should I do if castor oil causes irritation?
A: If you experience irritation from castor oil, immediately discontinue use and rinse your face with warm water. Consider diluted versions or alternate cleansing oils that are gentler on your skin. For persistent irritation, consult a dermatologist.
Q: Can I mix castor oil with other oils for better results?
A: Yes, mixing castor oil with lighter oils like coconut or olive can enhance its cleansing properties and make it more suitable for various skin types. This combination allows for effective cleansing while moisturizing and soothing the skin.
Q: Is it necessary to follow up with a toner after using castor oil?
A: While not strictly necessary, using a toner after cleansing with castor oil can help remove residual oil and balance your skin’s pH. Look for a toner that matches your skin needs, such as hydrating for dry skin or clarifying for oily skin.
Q: How do I properly store my DIY castor oil cleanser?
A: Store your DIY castor oil cleanser in a cool, dark place, preferably in a dark glass bottle to protect it from light, which can degrade the oil. Ensure the lid is tightly sealed to prevent contamination. This way, it can last several months.
Q: What are the advantages of using castor oil over commercial cleansing products?
A: Castor oil is a natural cleanser that doesn’t contain harmful chemicals found in many commercial products. Its moisturizing properties help maintain skin hydration while effectively cleansing without stripping the skin’s natural oils, making it a gentle option for many.
Q: Can I use castor oil on problem areas, like acne?
A: Yes, castor oil can be effective for acne-prone skin due to its antibacterial properties. Applying it directly to problem areas can help reduce inflammation and redness. However, always patch-test to see how your skin reacts first.
The Conclusion
Ready to elevate your skincare routine with castor oil as an oil cleanser? By using this natural wonder, you can effectively remove impurities while also moisturizing your skin. Remember, a little goes a long way-apply just a dime-sized amount to your damp skin in gentle circular motions for about 30 seconds. If you enjoyed discovering the benefits of castor oil, check out our comprehensive guides on DIY skincare solutions and the best oils for your skin type.
Don’t let uncertainty hold you back! Now is the perfect time to experiment and see how castor oil can transform your cleansing routine. Share your experiences or any lingering questions in the comments below; we love to hear from you! Plus, for more tips and personalized advice, make sure to subscribe to our newsletter. Let’s keep exploring together-your best skin awaits!
Get our latest guides, news, and insights highlighted in your Google Search & AI Overviews.