Finding the perfect lipstick shade can be a daunting task, especially with countless brands offering endless color options. Did you know that the same color can look completely different depending on the brand? That’s why learning how to match different brand lipstick colors accurately is essential for achieving that flawless look. Whether you’re a makeup novice or a seasoned pro, understanding how to identify undertones and color families can elevate your beauty game. In this guide, we’ll explore practical tips and insider secrets to help you navigate the lipstick aisles with confidence. With the right knowledge, you’ll effortlessly select lip colors that complement your unique skin tone and style, making your beauty routine not only simpler but also more enjoyable. So let’s dive in and unlock the secrets to perfect lip color coordination!
Understanding Lipstick Color Theory for Perfect Matches
Understanding how to navigate lipstick color theory can transform your makeup routine, enabling you to choose shades that perfectly complement your skin tone and enhance your overall look. At the core of this is the concept of color families, which are categorized into warm, cool, and neutral tones. Identifying your personal color family is the first step toward achieving a harmonious match with your lipstick selections.
To break it down, warm tones typically suit lipsticks with yellow, peach, or golden undertones, while cool tones are enhanced by shades that contain blue, pink, or violet elements. Neutral tones have the flexibility to wear both warm and cool shades but often are best matched with colors that fall in between, like soft mauves or rosy nudes. By understanding your undertone, you can narrow down your options and avoid the frustration of mismatched hues.
When exploring the world of lipstick, remember that the finish and pigmentation of a formula can also influence how the color appears once applied. Sheer formulations can alter how a color reads against your skin, appearing lighter than it looks in the tube, while matte finishes tend to be more true to their color. Additionally, different brands may have their unique formulations, which can affect the shade outcome even if the color appears similar in the package. Therefore, swatching and testing in natural light is crucial to ensuring you achieve the perfect match.
Ultimately, achieving flawless lipstick color compatibility goes beyond just picking a shade that looks good in the store. It involves understanding light, undertones, and formula characteristics that allow you to express your beauty confidently. By approaching your lipstick selections with this knowledge, you can create looks that feel intentional and authentic to your unique style.
Identifying Undertones: The Key to Color Compatibility
Identifying the right undertone can be a game-changer in your lipstick selection process. It’s like having a secret key that unlocks the perfect shades for your unique skin tone, allowing you to achieve a polished and harmonious look. Understanding whether you have warm, cool, or neutral undertones will not only direct you toward flattering lipstick colors but also boost your confidence when mixing and matching different brands.
To determine your undertone, start with a simple test using a piece of jewelry. If gold pieces complement your skin better, you likely have warm undertones. Conversely, if silver enhances your complexion, you might be cool-toned. Those who look good in both may fall into the neutral category. Additionally, consider examining the veins on your wrist: blue veins indicate a cool undertone, while greenish veins suggest warmth. Neutral undertones usually have a mix of both appearances.
When it comes to lipstick, knowing your undertone allows you to select shades that truly harmonize with your skin. For warm undertones, lipsticks in peach, coral, and warm reds will create a lively and youthful look. If you have cool undertones, lean toward berry shades, pinks, and true reds with blue undertones, which can add depth and vibrancy to your overall appearance. Neutral shades have a lot of versatility, allowing you to explore both ends of the spectrum, but look for colors that blend warm and cool tones seamlessly.
To further enhance your experience, remember that brand formulations can vary significantly. Even if two lipsticks are labeled with the same color name, their undertones may differ based on the brand’s unique pigment blend. Therefore, always swatch lipsticks on your lips or skin-preferably in natural light-to see how the color interacts with your undertone. This makes for a more accurate representation of how the shade will appear when worn, ultimately aiding you in building a lipstick collection that you love and that flatters your unique beauty.
Exploring Brand-Specific Formulations and Shades
Finding the right lipstick can feel like searching for the Holy Grail, with each brand offering a plethora of shades and formulations that promise the perfect match for your unique coloring. However, understanding the nuances of brand-specific formulations can make this quest much easier and more satisfying. Not all lipsticks are created equal; even shades with the same name across brands can differ significantly in undertone and texture. This means that effectively matching different brand lipsticks requires a bit of exploration and awareness.
When considering color, start by noting that the same shade might look entirely different depending on the formulation. For example, a matte lipstick may appear deeper or more intense compared to a satin or glossy finish, which can reflect light differently and soften the color. Brands like MAC, known for their extensive range, can offer a vibrant red like “Ruby Woo” that may appear starkly different on someone with warm undertones versus cool. Similarly, brands like NARS or Fenty Beauty might categorize their reds under different undertone spectrums, such as warm or neutral, which could further influence how those shades complement your skin.
It’s also essential to consider the ingredients and overall formulation. For instance, a creamy lipstick from brands such as ColourPop may deliver a sheer finish that allows your natural lip color to show through, while a liquid matte from Kat Von D provides full coverage but may feel dryer on your lips. If you prefer a comfortable, hydrating formula, look for brands that prioritize nourishing ingredients such as shea butter or jojoba oil. Always check the descriptions or labels, as many brands now clearly state whether a shade is warm, cool, or neutral.
Finally, brand loyalty can sometimes limit your color exploration. Don’t hesitate to mix and match; for example, pairing a long-lasting matte from one brand with a moisturizing gloss from another can not only enhance the finish but also create a unique shade that complements your skin perfectly. Remember that the journey to find your ideal lipstick shade is not only about color but also about how the lipstick feels and wears on your lips. Experiment with swatches in natural light, and don’t shy away from asking for samples at beauty counters; sometimes the perfect match lies beyond what you initially expected!
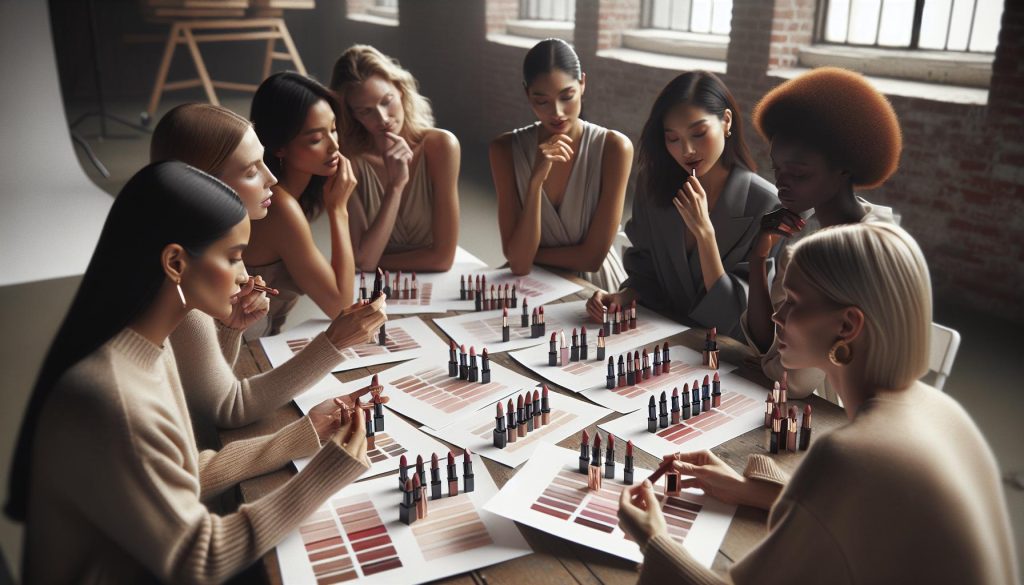
Step-by-Step Guide to Swatching Lipsticks
Swatching lipsticks is more than just a fun way to play with color; it’s an essential technique for finding the perfect shade that complements your unique skin tone and enhances your overall look. To maximize accuracy in matching different brand lipsticks, it’s crucial to follow a structured approach to swatching. This step-by-step guide will help you navigate the process seamlessly.
Start by preparing your lips and workspace. Make sure your lips are hydrated by applying a light lip balm and allowing it to absorb for a few minutes. This step ensures that the lipstick glides on smoothly and your natural lip color doesn’t interfere with the swatch. Next, use a clean, flat surface – like a tabletop or a large mirror – where you can easily see the swatches and compare them side by side.
When you’re ready to swatch:
1. Select Your Lipstick Shades
Gather a variety of lipsticks across different brands and undertones. For instance, choose shades labeled as cool, warm, and neutral. This variety allows you to see how each color interacts with your skin tone.
2. Apply Properly
Using a clean fingertip or a small lip brush, apply a small amount of lipstick on the back of your hand. For better results, consider swiping the formula across your skin in a straight line, approximately one inch long. This technique creates enough space to visualize the shade without it becoming muddy.
3. Observe the Color in Natural Lighting
After applying, step into natural light whenever possible. Artificial lighting can alter the perception of colors, making them appear different than in daylight. Observe how the lipstick shade looks against your skin tone. Are there any undertones that stand out more? This observation is crucial for determining if the lipstick enhances your natural coloring or washes you out.
4. Allow It to Settle
Give the lipstick a moment to settle onto your skin before making a final decision. Some formulas can change slightly as they dry. Spend a minute looking at the shade’s depth and how it mingles with your natural lip hue.
5. Compare and Contrast
To gain a well-rounded view of how the shades perform, use multiple swatches. Lay down several shades side by side on your hand, and if space allows, include some in similar tones but different formulations. This side-by-side comparison can reveal nuances that help you choose the best match.
Finally, remember to take notes if you’re testing several shades. Jot down notes about the brand, shade name, and your initial thoughts on how each color complements your skin undertones. Whether you’re going for a bold statement or a subtle enhancement, this methodical swatching approach will streamline your search for the ideal lipstick match. With practice, you can become a swatching pro – and your perfect lipstick is just a few swipes away!
Tools and Techniques for Accurate Color Matching
Matching lipstick shades can feel overwhelming, especially with the vast array of colors available across different brands. However, having the right tools and techniques can simplify this process and ensure that you find your perfect match. To get started, consider investing in a few essential items that will make your color-matching journey more efficient and enjoyable.
One of the most useful tools you can have is a good quality lip swatching palette. These palettes often come with clear sections that allow you to apply multiple shades side by side for easy comparison. You can also use a large, smooth surface-like a tile or acrylic sheet-to swatch lipsticks. These surfaces provide a clean backdrop and are easy to wipe down between uses, keeping your swatching area hygienic and organized.
Understanding Color Theory
Having a basic understanding of color theory can enhance your ability to select flattering shades. Familiarize yourself with the concepts of warm, cool, and neutral undertones, as this will help you identify which shades will work best for your skin tone. Keep a color wheel handy as a reference; it can help you visualize complementary and contrasting shades. For instance, if you have warm undertones, you might find that shades with orange or golden tones look more harmonious on you, whereas cool undertones may gravitate towards blue or pink hues.
Utilizing Natural Light
The lighting in which you evaluate your lipstick shades can drastically affect how the colors appear. Always swatch lipsticks in natural light whenever possible. This setting provides the most accurate representation of how the colors will appear in day-to-day life, helping you avoid the disappointment of a shade that looks great under artificial light but not in the sunlight. If you’re indoors, try to sit near a window or use a portable daylight lamp specifically designed for makeup applications.
Swatching Techniques
When it comes to swatching, applying the lipstick properly makes a significant difference. Use a small lip brush for precise application and to manage the amount of product you’re using. For best results, apply a swatch on your inner wrist, as this area often closely resembles your lip color and gives a clear indication of how the shade will blend with your natural lip tone. Moreover, layering the lipstick can provide a more accurate display of its opacity and finish; consider applying one coat, letting it dry, and then adding another layer.
Incorporate these tools and techniques into your swatching routine and watch as your lipstick color matching skills improve. Remember, it’s all about experimentation! Take notes on your findings, and don’t hesitate to revisit shades that may not have worked initially; sometimes, the perfect match is just a second try away.
Common Mistakes When Matching Lipstick Shades
Choosing the right lipstick shade can often feel like navigating a labyrinth of colors, undertones, and formulas. Mistakes in this process can lead to frustration and wasted money on products that simply don’t complement your look. One common pitfall is overlooking your undertones-if you have warm undertones and reach for a cool-toned lipstick, the shade may clash with your natural complexion, resulting in a less flattering appearance.
Another frequent misstep is relying solely on how a lipstick looks in the tube or online. Colors can change drastically once applied to your lips, especially when influenced by your natural lip color. To combat this, swatch lipsticks on your wrist or lips rather than just viewing them in their packaging. This allows you to see how the product interacts with your unique coloring.
Additionally, many people underestimate the importance of lighting when testing shades. The harsh, artificial light of a store can distort colors, making them appear different than they will in natural sunlight. To avoid surprises, always check your swatches in a well-lit area, preferably with natural light. If you’re unsure, take your swatches outside for a true representation of the color.
Lastly, rushing through the process can lead to poor decisions. Take your time to swatch multiple shades and evaluate them properly. Layering colors and allowing them to dry can provide insight into their finish and opacity. Patience and attention to detail can make all the difference in finding your perfect match. Embrace the journey of experimenting with different shades and techniques-after all, beauty is about exploration and finding what truly makes you feel confident and beautiful!
How to Create a Custom Lipstick Mix
Creating a custom lipstick mix is an exciting way to personalize your beauty routine. By blending different shades and textures, you can craft a unique hue that perfectly complements your individual style and skin tone. But where do you begin? Let’s break down the steps to mixing your very own lipstick shades, ensuring you’ll have a custom color that not only looks great but feels fabulous too.
Start by gathering your materials. You’ll need a variety of lipsticks in different shades, a small palette or mixing surface, a spatula or lip brush, and a small container for your final mix. When choosing lipsticks, think about the colors you love and those you rarely reach for. Sometimes, a bold color mixed with a neutral shade can give you a beautiful custom tone. For instance, combining a vibrant red with a creamy nude can create the ideal everyday shade that’s not too overpowering.
Mixing Techniques
To create your mix, begin with a small amount of each lipstick you want to blend. Use the spatula to scoop a little of each color onto your mixing surface. Start with the base color that you want to dominate and add accents of the other shades gradually. This approach allows you to control the final color better. Remember, it’s easier to darken or intensify than to lighten a color, so add darker shades slowly.
Once you’ve achieved a blend that pleases your eye, test it out. Apply a small amount to your lips to see how it interacts with your natural lip color. The final shade can look different once applied, so this step is crucial for getting it right. If necessary, adjust the mix by adding more of your desired shades until you reach your perfect color.
Storage and Application
Once you’re satisfied with your custom lipstick, transfer it into the small container for storage. Make sure it’s labeled with the ingredients for future reference, in case you want to recreate the same shade. Custom lipstick mixes can sometimes dry out, so consider adding a drop of lip balm or coconut oil to keep it smooth and blendable.
Remember, experimenting is part of the fun! Don’t hesitate to try various combinations and textures to discover what works best for you. Whether you prefer a matte finish or a glossy look, finding that perfect mix may inspire your go-to lip color for every occasion. Enjoy the process, and celebrate the creativity of making a lipstick that is uniquely yours!
Testing Lipsticks Under Different Lighting Conditions
When it comes to choosing the right lipstick, lighting can be your best friend or your worst enemy. The way a lipstick shade appears under different lighting conditions can dramatically affect your perception of its true color. For instance, a shade that looks great in the store may appear entirely different under the harsh fluorescents of your office or the warm glow of a candlelit dinner. Understanding how to test lipsticks in varying lighting can ensure you select a hue that flatters you in any situation.
To get started, gather some of your favorite lipsticks and head to areas with different lighting types. Natural daylight, incandescent bulbs, and LED lights can all produce varying undertones. Here’s a simple approach to evaluating the shades:
- Natural Light: Ideally, you want to check your lipstick in bright, natural light. This shows the true color without distortion. Apply a small amount and step outside or sit by a window to see its real hue.
- Warm Indoor Light: Incandescent bulbs can give your lip color a warmer tilt. Check how the lipstick looks under these lights, especially if you plan to wear it in cozy indoor settings.
- Cool, Bright Light: LED lights can create a cooler effect. Testing your shade in this type of light is crucial if you often wear makeup in places like offices or shops where bright lighting is prevalent.
While testing, apply a minimal amount of lipstick to avoid overwhelming your lips and to help you see the color better. Pay attention to how the formula interacts with your natural lip color, as this can also alter your perception. It might be beneficial to take a selfie in each type of lighting to compare how the color appears on camera, giving you a better idea of how it will look in various environments.
Remember, the goal is to feel confident in your choice. If a shade looks great in natural light but washes you out under artificial lighting, it may not be the ideal pick for you. Through this testing approach, you’ll be equipped to choose lip colors that complement your look, no matter where you’re headed.
Caring for Your Lips Before Applying Color
Before diving into your favorite lipstick shades, giving your lips the proper care is crucial for a flawless application. Healthy, well-prepared lips not only enhance color accuracy but also improve wearability and overall comfort. By following some simple yet effective steps, you can ensure your lips are in tip-top shape, ready to flaunt that perfect hue.
Start by exfoliating your lips to remove any dead skin. You can do this using a gentle lip scrub or even a DIY option like a mixture of sugar and honey. Gently massage the scrub onto your lips for about 30 seconds, then rinse off with lukewarm water. This will create a smooth canvas, allowing your chosen lipstick to adhere better and appear more vibrant. Aim to exfoliate a couple of times a week, especially before a big outing or when trying on new shades.
Next, hydration is key. Apply a nourishing lip balm to replenish moisture and create a barrier that helps prevent your lips from drying out during the day. Look for balms containing ingredients like shea butter, coconut oil, or vitamin E-as these provide intense hydration and conditioning. Allow the balm to soak in for a few minutes before applying your lipstick; this will help seal in moisture and keep your lips feeling soft throughout the day.
If you’re planning to wear a long-lasting or matte lipstick, consider using a lip primer. Primers smooth out any imperfections and create a base that enhances the lipstick’s staying power. Simply apply a small amount evenly over your lips and allow it to set for a minute before reaching for your color.
Remember, the overall health of your lips can influence the way lipstick looks and feels. Regular upkeep with these methods can lead to a more polished final look while dramatically increasing your confidence as you wear your new favorite shades. It’s all about setting the stage for the perfect lip color to shine!
Tips for Maintaining Your Lipstick Throughout the Day
Maintaining the perfect lipstick look throughout the day can be an art, especially when you blend shades from different brands. While it’s important to start with a great application, keeping that vibrant color intact requires a few thoughtful strategies. Here are some tips to help you maintain your lipstick, no matter the formula or brand you choose.
First, consider touch-ups as an essential part of your routine. Carry your lipstick or a similar shade for quick fixes. It’s helpful to have a small mirror with you so you can apply with precision. For a more seamless touch-up, blot your lips gently with a tissue before reapplying. This removes any wear and tear from previous eating or drinking, creating a fresh base for your new layer. You’ll find that just a dab of color can refresh the entire look.
Next, to prevent your lipstick from fading too fast, you might want to try a lip stain or a long-wear formula underneath your regular lipstick. These products provide a base that clings to your lips and helps hold subsequent colors in place for longer periods. Apply a lip stain first, allow it to dry, and finish with your lipstick on top for added color and texture.
Another technique involves layering. If you’re mixing different brand lipsticks, start with a lighter shade and gradually add darker colors to create depth. This not only allows you to customize your look but also gives you a chance to manage how the shades interact with each other throughout the day. Remember that layering may require more significant upkeep, especially if the shades are strikingly different.
Finally, always remember the power of hydration. Your lipstick’s longevity is directly affected by the condition of your lips. Throughout the day, apply a clear lip balm or gloss to add moisture and shine without disrupting the color. Choose formulas that are compatible with the lipstick you’re wearing to avoid any unsightly mixing that can occur with some finishes.
Incorporating these tips into your makeup routine will not only keep your lipstick looking flawless but also enhance the way the colors blend together, ensuring that you always step out with confidence and style.
Best Practices for Mixing Brands: A Practical Approach
Mixing lipsticks from different brands can be a fun way to express your creativity and achieve a unique shade tailored just for you. However, because different brands have varying formulations and finishes, some thoughtful techniques can help you blend them seamlessly. The key is to approach mixing with an understanding of how to harmonize colors and textures for a polished look.
Start by identifying the base colors of the lipsticks you want to blend. Consider the undertones-whether they’re warm, cool, or neutral-as this can significantly impact the final result. For instance, mixing a warm peach shade with a cool-toned berry may yield an unpredictable outcome that clashes. To create a more harmonious blend, stick to shades with similar undertones or try to balance them, such as pairing a warm red with a nude that has warm undertones.
When you’re ready to combine, use a lip brush for precision and control. This allows you to start with a small amount of each color and gradually build up to your desired shade and opacity. Start by applying the lighter shade down the center of your lips, then layer the darker shade along the outer corners. This technique not only enhances dimension but also gives you an opportunity to adjust the mix as you go. If the blend isn’t quite right, simply wipe it off and try again!
Lastly, consider the finishing touches. Some brands feature matte formulas while others offer glossy finishes. Decide on the finish you want before you start mixing; a satin finish can often bridge the gap between matte and shiny products, allowing for a smoother blend. After your lip color is applied, a light layer of clear gloss can help meld different textures together, brightening the overall look and adding hydration to your lips.
By applying these strategies, you can confidently mix brands and shades to create that perfect lip color that feels uniquely yours. Remember, practice makes perfect, so don’t hesitate to experiment with different combinations until you find your signature look!
Recommended Products for Color Matching Excellence
Finding the right products to achieve perfect lipstick color matching can be a game-changer in your beauty routine. Whether you’re a seasoned makeup enthusiast or a casual user, having the right tools and formulas at your fingertips can simplify the process of blending, swatching, and customizing your lip colors.
Invest in a versatile lip brush that allows for precision when mixing and applying lipsticks from different brands. A good lip brush, like the Sigma Lip Brush, not only helps you blend colors smoothly but also provides control to layer shades without overwhelming your lips. If you often mix different finishes, consider a dual-ended lip brush that has a precision tip on one end and a blending side on the other, catering to a variety of textural needs.
When it comes to formulations, explore brands like MAC Cosmetics and NARS, which are renowned for their diverse shade ranges and consistent quality. MAC’s line of Matte Lipsticks pairs beautifully with NARS’ Velvet Matte Lip Pencil-the creamy texture of NARS provides a seamless blend when layered over the matte formula of MAC. Mixing these specific brands can yield a sophisticated custom shade that shows off your unique style. For those seeking a little more guidance, tools like the Color Wheel can visually aid in understanding complementary and contrasting shades, assisting you in pairing colors that work well together.
To ensure that your newly mixed lip shades maintain their vibrancy throughout the day, consider using lip primers such as Too Faced Lip Insurance. This product not only enhances the color payoff but also creates a smooth canvas for easier blending, preventing feathering and enhancing wear time. Don’t forget to keep a hydrating lip balm on hand, as it keeps your lips nourished, making it easier to reapply any color without drying them out.
Overall, selecting the right products not only enhances your lipstick application but also elevates your overall look. Remember, practice and experimentation are key, so have fun mixing and matching to discover what works best for you!
FAQ
Q: How can I determine my skin’s undertone for better lipstick matching?
A: To identify your skin’s undertone, check the veins on your wrist. If they appear blue, you likely have cool undertones; if green, you have warm undertones; and if both, you may have neutral undertones. This understanding helps in selecting lipstick shades that complement your skin tone effectively.
Q: What are the best lighting conditions for testing lipstick shades?
A: Natural light is ideal for testing lipstick shades. Stand near a window or outdoors to see how the color looks in bright, indirect sunlight. Avoid fluorescent lighting, as it can alter the perception of colors. This ensures you select a shade that looks great in different environments.
Q: Why do some lipsticks look different on my skin than in the tube?
A: Lipstick colors can change due to your natural lip color and skin pH. Additionally, the lipstick’s formulation might react differently on various skin types. Always test the lipstick on your lips, not just on your hand, for an accurate representation of how it will appear when worn.
Q: How do I mix different brand lipsticks for a custom shade?
A: To create a custom lipstick shade, start with two compatible colors: one as the base and the other to adjust hue. Use a small spatula or lip brush to blend them on a clean surface. Test the mixture on your lips, adjusting as necessary until you achieve your desired color.
Q: What mistakes should I avoid when matching lipstick shades?
A: Common mistakes include ignoring undertones, overlooking the lipstick finish (matte vs. glossy), and failing to test in natural light. Always swatch on your lips to see how the shade interacts with your lip color and apply with various finishes to assess true appearance.
Q: How can I maintain the vibrancy of my lipstick color throughout the day?
A: To maintain your lipstick’s vibrancy, start with a lip primer to create a smooth base. Layer your lipstick and set it with a matching translucent powder or lip stain. Reapply as needed, and consider carrying a travel-sized version for touch-ups after eating or drinking.
Q: Can I use a lip liner to improve lipstick color matching?
A: Yes, using a lip liner can enhance lipstick adherence and prevent feathering. Choose a liner that matches your lipstick shade closely or your natural lip color. Fill in your lips with the liner before applying lipstick to create a more polished and lasting look.
Q: How can I find my perfect lipstick shade online without swatching?
A: Use online shade finders offered by many cosmetics brands that provide virtual try-ons. Look for reviews with swatches or user-uploaded photos to see how the shade appears on different skin tones. Additionally, consider brands that offer samples or money-back guarantees if the shade doesn’t suit you.
In Conclusion
Now that you’re equipped with the knowledge of how to match different brand lipstick colors accurately, it’s time to put your newfound skills into action! Remember, the key to finding your perfect shade lies in understanding undertones and testing in natural light. If you have any questions or want to share your favorite matching tips, please drop a comment below – we’d love to hear from you!
For further exploration, check out our guide on “Top 10 Essential Lip Products You Can’t Live Without” for more beauty insights, or dive into “The Ultimate Guide to Lip Care for Perfectly Plump Lips” to elevate your lip game even further. Don’t forget to subscribe to our newsletter for the latest updates and tips tailored just for you. Your ideal lipstick awaits – happy matching!