Creating a “Grandma Makeup” look for kids can turn a simple dress-up day into an unforgettable experience filled with laughter and creativity. This mini tutorial guides you through easy aging effects that let kids transform into charming elderly characters with just a few makeup tricks. Whether it’s for school plays, Halloween, or just for fun, mastering this playful makeup style can spark genuine joy and imagination.
In a world where creativity often takes a backseat, diving into the art of aging makeup not only teaches kids about colors and application but also encourages role play and storytelling. As we explore this fun and engaging process together, you’ll discover simple techniques and product recommendations that make it safe and accessible for little hands. So, grab your brushes and let’s embark on this colorful journey, creating giggles and unforgettable memories along the way!
Choosing the Right Makeup Products for Grandma Looks
To create a charming and entertaining grandma makeup look, choosing the right products is essential. A high-quality base can make all the difference. Look for foundations that offer a slightly matte finish to help diffuse imperfections, while also providing good coverage. A lightweight formula, such as a tinted moisturizer or BB cream, can work well to give skin a natural look without appearing heavy. Brands like Lancome and NARS often offer great options that can cater to different skin types.
In addition to foundation, consider using a creamy concealer to address areas that might need a bit more attention. Look for shades that match the foundation but are a touch lighter to brighten areas like under the eyes. It’s best to apply with your ring finger, using gentle tapping motions for a soft application. As for blush, opt for shades that impart a rosy glow, reminiscent of youthful cheeks. Cream blushes can provide a more natural finish, mimicking the skin’s natural texture.
Don’t forget about the eyes! Soft, neutral eyeshadow palettes can evoke the classic grandma look without overwhelming the appearance. Think soft beiges, browns, and lavenders. For the eyeliner, a brown pencil can add definition while appearing softer than black. Lastly, a volumizing mascara can finish the eye makeup, giving the look a gentle lift.
Accessorizing your makeup with the right tools is just as important. Use brushes that are soft and well-made, as they blend products seamlessly. A good blending sponge can also assist in achieving a flawless finish and help soften any harsh lines, which is important in this age-appropriate look.
In summary, choosing the right makeup products for a grandma look involves selecting lightweight and creamy formulations, soft color palettes, and high-quality tools. These choices will amplify the natural beauty while paying homage to grandma’s classic styles.
Essential Tools for Creating Aging Effects
Creating realistic aging effects in makeup requires not just skill but also the right set of tools that cater to the unique texture and needs of mature skin. When embarking on a grandma makeup adventure-especially with kids-it’s essential to equip yourself with tools that simplify the process while providing authentic results. Think of your makeup tools as companions on this creative journey, helping you achieve the charming look of a beloved grandma.
To begin, you’ll want a good set of makeup brushes. Choosing brushes with soft bristles ensures that applications are gentle, reducing tugging and dragging on delicate skin. Look for various shapes: a fluffy brush for powder, a smaller rounded brush for contouring, and a flat brush for applying concealer. Each brush serves a specific purpose and allows for precise control when creating shadows and highlights that mimic aging.
A makeup sponge is another essential tool. It’s perfect for applying foundation and blending edges seamlessly. Using a damp sponge can also keep the skin looking hydrated and fresh, which is particularly important for achieving that granny glow. When using the sponge, aim for dabbing motions instead of sweeping, as this will provide better coverage and a more natural finish.
Setting powders and sprays are crucial in locking in your look and helping each layer blend effortlessly. Look for translucent powders that set makeup without adding extra color, ensuring the final appearance doesn’t look cakey. A light spritz of setting spray at the end keeps everything in place while give a dewy finish.
When it comes to aging lines and textures, a fine eyeliner brush can be a game changer. It allows for detailed work around the eyes, especially when creating the effects of fine lines and shadow. Pairing this with a light, creamy product will help achieve soft line definitions instead of harsh, unnatural marks.
In summary, the key tools you’ll need for creating aging effects include soft makeup brushes, a sponge for blending, setting powders, sprays, and a fine eyeliner brush. These items not only make the application smoother but also improve the final look, making it easier and more enjoyable for kids to help create a beautiful grandma look. Embrace playfulness throughout the process; makeup isn’t just about the final result but also the bonding experience it brings.
Step-by-Step Guide to Applying Grandma Makeup
Starting the process of applying grandma makeup can be an exciting journey, especially when you’re involving children. They’ll love the chance to explore their creativity! Here’s how to achieve a charming grandma look with easy-to-follow steps.
Begin by prepping the skin. Start with a gentle moisturizer to hydrate and prime the face. This step is crucial for achieving a smooth and comfortable base, especially for mature skin. Use a makeup sponge to apply a lightweight foundation that matches the skin tone while being careful to blend it well into the jawline and neck.
Next, it’s time to add age-appropriate effects. Use a creamy concealer to highlight areas like the under-eye area, but go a shade or two lighter to mimic the natural highlights of youthful skin. For the aging effects, choose a matte foundation one shade lighter than the main foundation and lightly apply it around areas where you want to create depth, like the hollows of the cheeks or around the nose.
Mimicking Wrinkles and Fine Lines
To effectively create the illusion of wrinkles and fine lines, take a fine eyeliner brush and a darker cream makeup product. Draw small lines horizontally across the forehead and around the eyes, ensuring they are not too deep for a more realistic appearance. Use your same damp sponge to gently dab over these lines to soften the edges, blending them seamlessly into the foundation.
Enhancing the Aging Look with Color
Using color theory can enhance your grandma makeup. Choose earth tones for the eyes, like soft browns and taupes, to add warmth and a bit of drama. A light application of blush in a muted pink can prevent the look from becoming too flat. Place it higher on the cheeks to create that classic “granny glow.” Always remember that a little color can go a long way, so build it up gradually.
Finishing Touches
Finally, complete the look with a light dusting of setting powder to keep everything in place without making it cakey. A little setting spray can help achieve that dewy grandma look we’re going for. For the lips, choose a neutral or soft pink lipstick that doesn’t overpower the natural features, applying it with a light hand for a soft finish.
Incorporating these steps not only results in a delightful grandma look but also creates a fun bonding experience for you and the children involved. Encourage them to express their creativity while learning about principles of makeup application and color dynamics. Have fun and don’t be afraid to laugh at the quirks along the way!
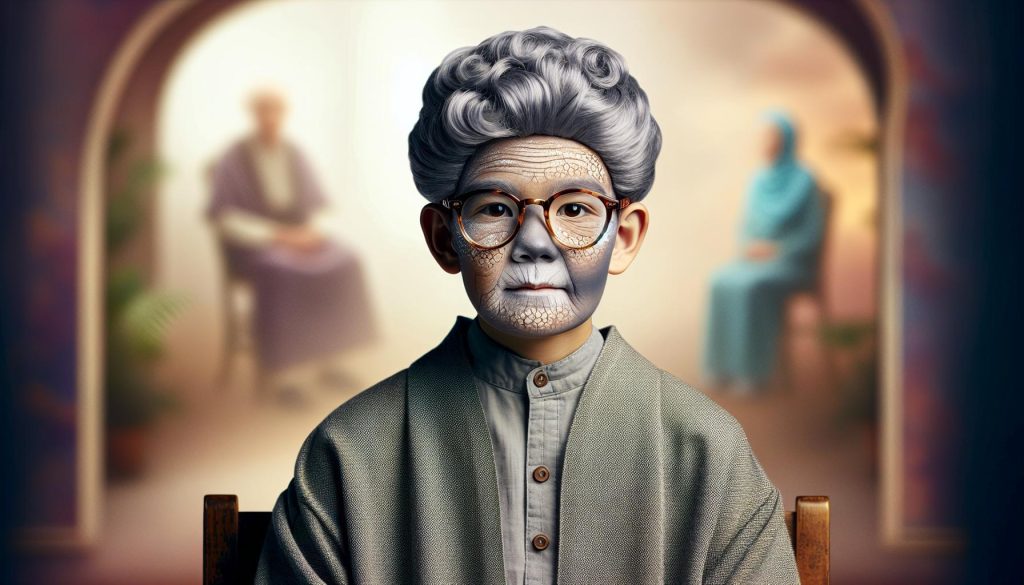
How to Mimic Wrinkles and Fine Lines Effectively
Creating the impression of wrinkles and fine lines can be an enjoyable part of the grandma makeup process, especially when working with kids who can see how makeup transforms appearance. This technique not only highlights the artistry of makeup but also teaches children about the different effects they can create on the face. To achieve a realistic look, it’s essential to use the right products and techniques.
Begin by choosing a suitable cream makeup product in a shade slightly darker than the foundation. This will help create the depth needed to mimic natural creases in the skin. Using a fine eyeliner brush, carefully draw small, subtle lines on the forehead, around the eyes, and at the corners of the mouth. Aim for short, delicate strokes that mimic natural skin texture rather than deep grooves. For instance, you might draw a few lines across the forehead just above the eyebrows, then add small curves around the eyes to represent crow’s feet.
Once the lines are drawn, take a damp sponge and gently dab over your drawing. This softens the harsh edges and blends the darker lines into the surrounding skin, creating a more natural effect. If the lines appear too stark, simply use more foundation to lighten them or add a little moisturizer to the sponge for a softer touch. The key here is to maintain a light hand; you can always add more detail, but it’s harder to take it away once it’s there.
To enhance the aging effect further, consider layering in subtle shadowing with a darker powder in certain areas. Places like the hollows of the cheeks and along the jawline can be emphasized to create the illusion of depth. Remember, the goal is to build up the look gradually; you want it to be effective but not overwhelming. By experimenting with techniques like these, you and your young artist can have fun creating a charming and age-appropriate grandma makeup look together!
Using Color Theory for Aging Effects in Makeup
Using color theory effectively in makeup can transform the way aging effects are created, especially when aiming to craft a fun and convincing “grandma” look. Understanding how colors interact allows you to manipulate the visual perception of the face, enhancing features or creating the illusion of age with simple but deliberate choices.
Begin by selecting colors that contrast beautifully with skin tones. For instance, using browns and grays can help mimic the natural aging process, as these shades can be used to create shadows and depth. A matte taupe or soft beige works well as a base for contouring hollows and softening facial features. Applying lighter shades like soft pinks or peaches on the cheeks can imitate the youthful glow often lost with age, creating a balanced effect. Remember, the idea is to layer these tones gradually; a little goes a long way.
When applying these colors, think about where the natural light falls on the face. Highlighting the tops of the cheeks, the bridge of the nose, and the brow bones with lighter, shimmery shades such as champagne or soft white can draw attention to these areas while softening the overall look. On the other hand, deeper shades around the jawline and temples can create the impression of sagging or pronounced features typically associated with age. Just as you would a painter on a canvas, use contrasts to shape and define the overall appearance subtly.
Utilizing complementary colors can also enhance the aging effects. For example, if your base color is warm, introducing cooler tones like lavender or muted blues can enliven the look while still contributing to that sophisticated aged effect. Mixing these tones together ensures that your makeup does not look overly flat, adding depth and complexity that reflects natural skin variations.
For a playful twist that keeps the process engaging, involve kids by letting them choose colors and apply them under your guidance. They might suggest an unexpected color that could turn out to be perfect! This hands-on approach not only nurtures creativity but also turns the makeup session into a fun learning experience about color and texture. Follow the principles of color theory, and you’ll create stunning aging effects that are both realistic and enjoyable to produce.
Tips for Blending Techniques to Enhance Aging Looks
Creating a convincing aged look in makeup artistry relies heavily on blending techniques that enhance the appearance of age without crossing into the realm of caricature. The key to achieving that coveted “grandma” aesthetic lies in how smoothly you transition between colors and textures to emulate the natural variations in skin.
Start by using light, feathery strokes when applying makeup. Opt for a fluffy blending brush for softer products like blush or eyeshadow. This not only diffuses color but also mimics the way skin tones change with age. For instance, when applying blush, rather than just swiping it on, use circular motions to build up color gradually. Begin with a small amount applied to the apples of the cheeks, then blend it back towards the temples to create a softer finish that resembles the natural flush of older skin.
Another essential technique is the layering of products. Use a mix of creams and powders for a real skin-like finish. Start with cream blush and then set it with a matching powder. This two-step process enhances staying power while giving a more dimensional look as the cream will reflect light while the powder adds a soft matte finish, helping to create depth and texture reminiscent of aged skin. Remember to keep your touch light; layering too heavily can muddy the overall effect.
For the eyes, blending is critical to achieve depth without harsh lines. Use a gentle patting motion with a soft brush to apply eyeshadow, especially in darker hues. Start at the outer corners and work your way in, gradually building layers until reached the desired intensity. This method allows for a more blended effect, making the colors appear to transition naturally rather than abruptly. When it comes to liner, opt for softer shades like deep browns or grays, smudging them slightly for a soft-focus look that mimics the less defined lines of older eyes.
Finally, always pay attention to highlight and shadow placement. Natural aging results in certain areas of the face appearing more sunken or shadowed. Use a warm, light highlighter on the highest points of the cheekbones and on the brow bone, while applying a slightly darker contour shade in the hollows beneath the cheekbones and in the temples. This not only adds dimension to the face but also reflects the reality of how skin and tissue age over time.
By mastering these blending techniques, you not only enhance the aging effect but also ensure your makeup remains elegant and realistic-delivering a look that’s reminiscent of a beloved grandmother’s charm rather than a costume. Happy blending!
Creating Realistic Aging with Face and Eye Makeup
Creating a believable aged look with makeup is a delightful challenge that allows creativity to flourish. It’s essential to blend colors and textures skillfully to mimic the natural changes that occur in older skin without veering into exaggerated caricatures. The secret to achieving this lies in careful product application and the right techniques, which can be fun to explore, especially when kids are involved.
Start by focusing on the face. Since aging often leads to a loss of volume, use a cream foundation in a shade slightly lighter than the wearer’s skin tone. This gives a more youthful glow while providing a base for the aging effects. Apply the foundation using a damp sponge with a gentle stippling motion; this ensures a light, even coverage that doesn’t settle into fine lines. For a delicate touch, consider mixing a bit of moisturizer with the foundation, which provides a dewy finish and keeps the look fresh.
When it comes to shadowing and highlighting, these elements are crucial for adding dimension. Use a light highlighter on the cheekbones, brow bones, and tip of the nose to create areas that catch the light, accentuating the high points of the face. In contrast, apply a darker contour product in the hollows of the cheeks and sides of the nose to create depth. To achieve a realistic effect, blend these products seamlessly. For blending, use a clean brush to gently feather out any harsh lines, allowing the lighter and darker shades to flow into one another.
The eyes often show age more than any other feature, so special attention is needed here. Use soft, muted colors for eyeshadow; warm browns, soft mauves, or creamy taupes work well. Gently build the color on the eyelid with a fluffy brush, starting from the outer corners and blending inwards. To mimic aging, consider using a fine eyeliner in a deep gray rather than black; this softer look evokes less defined eye lines. Finish with a coat of mascara, but avoid heavy formulas that can clump and emphasize any fine lashes.
Lastly, remember that the key to natural-looking aging makeup is blending and layering with a light hand. The goal is to enhance features without overwhelming them. Keep the overall look cohesive, and feel free to involve kids in the process, letting them explore colors and techniques while imparting valuable lessons on makeup application. This not only makes it a bonding experience but also nurtures creativity and confidence in their artistic choices.
Accessorizing the Look: Hair and Outfit Considerations
Creating a convincing “grandma” look isn’t just about the makeup; it’s equally essential to blend the hair and outfit choices seamlessly. When dressing up for this playful transformation, you can help kids learn how each element contributes to the overall effect. Start by selecting clothing styles and colors that resonate with the nostalgic aesthetics commonly associated with grandmothers.
When it comes to outfits, think about classic pieces that embody a cozy, vintage feel. Items like floral dresses, loose sweaters, or cardigans work beautifully for a grandma look. Encourage layering, which not only adds depth to the ensemble but also reflects the practical, warm style seniors often embrace. Choose softer fabrics like cottons and knits in muted tones or pastels; these create a gentle, approachable vibe. Details like lace trims or embroidered patterns can enhance the authenticity, making the outfit feel even more charming.
Equally crucial is the hair. Depending on the look you’re aiming for, styles can vary significantly. For a more whimsical approach, consider soft updos, such as loose buns or braids. These styles often demonstrate elegance while framing the face nicely. Encourage the use of accessories like scarves or decorative hairpins, which can add a lovely touch and create a fuller look. If you’re aiming for a more relaxed style, let hair down in gentle waves or curls-scrunch a little mousse into damp hair to achieve that effortless volume.
Don’t forget about the details! Accessories play a vital role in completing the ensemble. Think about adding reading glasses, oversized handbags, or vintage jewelry to bring character to the look. Encourage kids to explore various combinations, helping them to understand how each piece contributes to the whole. By guiding them to make these choices, you’re not only helping them learn about style but also nurturing their creativity and decision-making skills.
Ultimately, accessorizing the look effectively requires a thoughtful approach to both hair and clothing, making the grandma makeup experience fun and memorable. Emphasizing comfort and charm will allow anyone to embody this delightful transformation naturally.
Understanding the Role of Lighting in Aging Effects
Lighting plays a crucial role in enhancing the aging effects of makeup, making it an essential consideration when creating that perfect “grandma” look. Utilizing different lighting techniques can dramatically alter how the makeup appears, allowing you to achieve a more authentic transformation. Natural lighting, especially during the golden hour, offers soft and flattering illumination that can highlight the subtleties in your aging effects, such as fine lines and wrinkles. This kind of lighting creates depth and realism, mimicking the way skin naturally reflects light.
Using harsh lighting, on the other hand, can wash out details and create unflattering shadows. To avoid this, consider setting up soft, diffused light sources. You can achieve this by using softbox lights or simply covering bright bulbs with a sheer white cloth to create a gentle glow. Position the lights at a 45-degree angle in relation to the face for the best effect-this will create depth and shadow that accentuates the features you want to highlight.
When applying the makeup, performing touch-ups in the same lighting used for the final reveal is a smart move. This ensures you won’t be taken by surprise later when you see the look under different conditions. For added fun, involve kids in lighting adjustments! Let them experiment with various setups and see how the makeup changes, fostering creativity and making the experience more educational.
In summary, paying attention to lighting not only enhances the aging effects of makeup but can also transform the entire project into a playful and engaging experience. Soft, natural light is your best friend here, and testing different setups will help you discover the most flattering conditions for the “grandma” look you aim to achieve. Embrace the process, and enjoy creating these fun transformations together!
Common Mistakes to Avoid When Doing Grandma Makeup
Creating the perfect grandma makeup look can be a fun and exciting project, but it also comes with its own set of challenges. Many people make common mistakes that can hinder their efforts or lead to unsatisfactory results. By being aware of these pitfalls, you can ensure that your grandma transformation is both successful and enjoyable.
A frequent error is over-applying products, particularly foundation and powder. While it might be tempting to layer on product to create an aged look, too much can lead to a heavy and artificial appearance. Instead, apply a thin layer of foundation with your fingers or a damp sponge for a more natural finish. Focus on areas where age is more apparent, such as around the eyes and mouth, and set your makeup lightly with translucent powder to avoid a cakey look.
Another mistake is neglecting skin prep. Before applying any makeup, it’s essential to prepare the skin to create a smooth canvas. Cleanse and moisturize your skin, and consider using a primer to help the makeup adhere better and last longer. Choose a hydrating primer if you’re aiming for a dewy finish, or a mattifying primer if you need to control shine, as both can enhance the final effect of aging makeup.
Additionally, failing to mimic realistic aging features can lead to a disappointing result. Instead of simply drawing lines or using dark colors to create shadows, aim to replicate the subtlety of real wrinkles and texture. Use a fine brush to apply light shades in the creases and edges of the mouth, eyes, and forehead where natural lines would form. Blending is your best friend here; it will help these details appear more lifelike and less like harsh applications.
Lastly, don’t overlook the importance of practice and experimentation. It’s normal for your first attempt at grandma makeup not to turn out perfectly. Keep an open mind, and don’t be afraid to try different techniques or products until you find what works best for your vision. Involving children can also make the process more enjoyable. They might have creative ideas or funny suggestions that could enhance the overall experience. Remember, the goal is to have fun while learning, so cherish the time spent on this unique project together.
Making it Fun: Involving Kids in the Makeup Process
Involving kids in the makeup process can transform a simple project into a fun, bonding experience. Not only does it spark creativity, but it also helps children learn about makeup artistry while spending quality time with you. Encouraging their input can lead to unexpected ideas and laughter, making the entire endeavor enjoyable and memorable.
Start by explaining the goal of your makeup project clearly. Show them pictures of what you’re aiming for, like classic grandma looks with soft colors or playful exaggerations of aging effects. This gives them context and sparks excitement. Let them pick out colors and products, emphasizing that there’s no right or wrong during this artistic exploration. For instance, give them the chance to choose between different eye shadow palettes or lip colors to see what they think works best for the “grandma” persona you’re creating. Kids often have a fresh perspective that can take the look in delightful directions that adults might not even consider.
When it comes to the actual application, assign specific tasks to keep them engaged. You could say, “You get to apply the blush while I work on the eyes!” Guiding them with simple instructions makes it easy for them to contribute at their skill level. For example, if they’re applying blush, show them how to use a light hand and blend in circular motions on the cheeks for a natural flush. This not only teaches them a valuable technique but also empowers them to make decisions throughout the process.
Make sure to celebrate each step, whether it’s a successful blending of colors or a funny misstep-laughter is the best element of a family project. You might even incorporate a mini photo shoot afterward so they can see the results of their hard work. This not only boosts their confidence but embeds a sense of accomplishment.
Ultimately, blending fun with learning helps paint a joyful experience that kids will remember fondly, drawing them into the world of beauty with excitement and creativity.
Inspiration: Famous Grandma Looks to Recreate
Bringing iconic grandma looks to life can be a delightful experience, especially when it’s fun for both kids and adults. Whether you’re inspired by classic characters from film and television or want to recreate memorable family matriarchs, there are plenty of famous grandmas to draw ideas from.
One beloved inspiration is the character of Mabel “Grandma” Simpson from The Simpsons. Her playful, exaggerated features-think bright lipstick and quirky accessories-make for a fun makeup session. Use vibrant colors for lips and cheeks, along with fun false eyelashes to mimic her character. Kids will enjoy channeling her eccentric style with chalky hair sprays for a silver-grey touch!
Another iconic figure is Grandma Addams from The Addams Family. Her look features dark, tasteful makeup with dramatic shadows. This allows you to teach kids about blending darker shades, as well as the art of creating a mysterious vibe. A touch of silver highlighter can also evoke her ethereal presence, perfect for those wanting to add a ghostly charm.
Don’t forget about real-life inspirations as well. Betty White embodied the essence of the loving grandmother-sweet yet vibrant, often seen with a warm smile and subtle makeup that emphasized her natural beauty. Encourage kids to keep it light, focusing on soft blushes and a touch of mascara for a gentle glow. This keeps the look classically beautiful without overwhelming their features.
Inspiration can be drawn from various sources, including iconic movie grannies, beloved animated characters, or even family photos. Encourage kids to explore different styles, emphasizing that there’s no right or wrong as they play with creativity. This approach not only fuels their imagination but also builds confidence as they step into their chosen grandma role, making the makeup process a memorable bonding experience.
Q&A
Q: How can kids safely practice grandma makeup without using harmful products?
A: Kids can practice grandma makeup safely by using non-toxic, child-friendly makeup products. Opt for washable face paints or makeup kits specifically designed for children. Additionally, read labels to ensure products are free from harmful ingredients and always conduct a patch test on a small area of skin.
Q: What are some creative expressions kids can explore with grandma makeup?
A: Kids can explore creative expressions by incorporating humor and storytelling into their grandma makeup looks. They might create a character for a school project, use props like glasses or shawls, or even perform a short skit dressed as grandmas, allowing them to embrace creativity while learning about aging.
Q: When is a good age for children to start experimenting with makeup, like grandma looks?
A: Children can start experimenting with makeup around age 5-7, focusing on fun and safe applications like face painting or themed makeup for dress-up. Grandma makeup can be introduced as they understand the creative aspects and have enough hand coordination for applying makeup.
Q: How can I ensure that the grandma makeup stays on during an event?
A: To ensure grandma makeup stays on, apply a primer before makeup to create a smooth base. Use setting spray or translucent powder to lock the makeup in place. Additionally, recommend touch-up products for kids to carry along for quick fixes throughout the event.
Q: Why is it beneficial for kids to learn about makeup application at a young age?
A: Learning about makeup application can boost children’s creativity, enhance fine motor skills, and foster self-expression. It also provides an opportunity for bonding through family activities, like doing makeup together, and can help kids develop confidence in their appearance.
Q: What are some common mistakes kids make when doing grandma makeup, and how can they be avoided?
A: Common mistakes include over-applying products and not blending well. To avoid these issues, guide kids to use small amounts of product and teach them blending techniques with a makeup sponge. Practicing step-by-step helps them improve their skills over time.
Q: Where can I find affordable makeup supplies for kids to use for grandma looks?
A: Affordable makeup supplies for kids can often be found at local dollar stores, discount retailers, or online marketplaces. Look for makeup sets designed specifically for children, which are budget-friendly and safe for their use. Check reviews to ensure quality.
Q: How can I save time while creating a grandma makeup look with kids?
A: To save time, pre-select makeup products and tools before starting. Use a simple application technique like sponge dabbing for quick coverage. Setting clear steps for them to follow can also streamline the process, making it easier and more fun for everyone involved.
Wrapping Up
Thank you for exploring “How to Do Grandma Makeup for Kids: Aging Effects Made Easy”! Remember, the key is to have fun and embrace creativity while using the techniques we’ve discussed. If you found this guide helpful, check out our related articles on “Creative Makeup Ideas for Kids” and “Safety Tips for Kids’ Makeup” to deepen your understanding and enhance your skills.
Ready to dive into this unique experiment? Grab your makeup supplies and get started today! Don’t forget to share your creations with us in the comments below-your stories can inspire others. For more expert tips and inspiration, consider signing up for our newsletter. We can’t wait to see what you come up with!