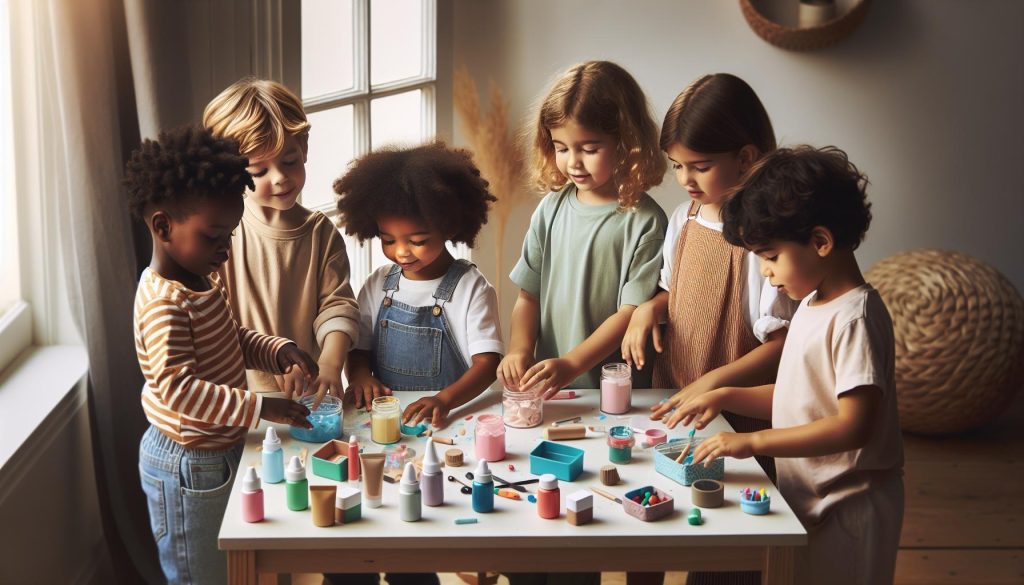
Every child loves to play dress-up, and what better way to enhance that imaginative play than with DIY fake makeup? Making your own play cosmetics not only sparks creativity but also ensures that your little ones can enjoy this fun without the worries of using real products that could irritate their skin. Crafting safe, homemade makeup together can be a delightful bonding experience, allowing kids to explore their artistic sides while giving parents peace of mind. With just a few simple, natural ingredients from your kitchen, you can create colorful lip balms, blushes, and eye shadows-all perfect for tiny faces and big imaginations. So, let’s dive into the fun world of DIY play cosmetics and discover how easy it is to whip up these playful products that will keep your kids engaged and entertained!
How to Choose Safe Ingredients for Kids’ Makeup

When crafting DIY play cosmetics for kids, the safety of the ingredients is paramount. Children’s skin is delicate, so choosing ingredients that are non-toxic and gentle is essential. Start by looking for natural components that are commonly found in home kitchens or health stores. Always opt for items that are free from harsh chemicals, synthetic fragrances, and artificial colors. For example, ingredients like coconut oil, shea butter, and beeswax can serve as excellent bases for various cosmetics, providing moisturizing properties without harmful additives.
Key Ingredients to Consider
When selecting ingredients, focus on those that are both safe and effective. Here are some excellent choices:
- Coconut Oil: A nourishing moisturizer that can be used as a base for lip balms and creams.
- Beeswax: This natural emulsifier helps bind ingredients together, perfect for creating balms.
- Shea Butter: Rich in vitamins, it’s great for skin and gives a creamy texture to makeup.
- Natural Colorants: Consider using foods like beet juice, turmeric, or cocoa powder for coloring your cosmetics safely.
- Essential Oils: Use sparingly for added fragrance; select kid-friendly options like lavender or chamomile.
Reading Labels and Avoiding Harmful Additives
Before using any product, even those labeled as “natural,” encourage careful label reading. Watch out for potentially problematic ingredients such as parabens, sulfates, and phthalates, which can irritate sensitive skin or be linked to health concerns. If you’re unsure about an ingredient, look it up or consult trustworthy resources, ensuring every element is suitable for your little one’s sensitive skin.
Establish clear practices for your kids when it comes to using DIY cosmetics. Teach them the importance of patch testing new products on a small skin area to ensure there are no allergic reactions. By prioritizing safety and using mindful ingredients, you can foster creativity through play while keeping your child’s well-being at the forefront.
Step-by-Step Guide to Making Play Lip Balm

Making your own play lip balm can be a fun and rewarding activity for both you and your kids! Not only does it allow for creativity, but it also gives you control over the ingredients, ensuring they’re fun, safe, and suitable for delicate skin. Plus, the satisfaction of applying something they created will boost their confidence and enjoy their creativity even more.
To get started, gather your ingredients and tools. For a simple play lip balm, you’ll need:
- 1 tablespoon of coconut oil: This serves as the base and provides moisturizing properties.
- 1 tablespoon of beeswax: It helps solidify the balm and adds a lovely texture.
- Optional: A few drops of essential oil for fragrance (like lavender or chamomile).
- Natural colorant (like beet juice or cocoa powder) for color – this is optional, but it can make your lip balm more exciting for kids.
Step-by-Step Instructions
- Melt the Base: Start by combining the coconut oil and beeswax in a small saucepan. Heat it over low heat, stirring occasionally until both ingredients are completely melted. This should take about 5 minutes. Be sure to monitor closely to avoid overheating.
- Color and Fragrance: Once melted, remove the mixture from heat. If you’d like to add color, stir in your natural colorant until you achieve the desired hue. Then, add a few drops of your chosen essential oil and mix well.
- Pour and Set: Carefully pour the mixture into small containers-old lip balm tubes or tiny jars work great. Allow them to cool at room temperature for about 30 minutes until they are fully set.
- Enjoy: Once cooled, your homemade lip balm is ready for use! Encourage your kids to apply their creation during pretend play.
Key Tips
- Patch Test: Before letting your kids use the balm extensively, do a patch test to ensure there are no allergic reactions, especially if you’ve added essential oils.
- Storage: Keep the lip balm stored in a cool, dry place. It generally lasts for about 6 months.
Creating this play lip balm not only fosters imagination but also allows for quality bonding time while ensuring the ingredients are safe and gentle for children’s sensitive skin. Happy crafting!
Creating Colorful DIY Face Paint Recipes
Creating your own face paint can be a delightful and imaginative project, especially for kids who want to explore the world of colors without the worry of harmful chemicals. Homemade face paint is not only safe but can also be customized to your child’s favorite shades, bringing out their creative spirit during playtime or dress-up sessions. Let’s dive into some fun and easy recipes that will result in vibrant colors while ensuring gentle, skin-friendly ingredients.
To start, you’ll need some basic ingredients you may already have at home. Here’s a quick list:
- 1 tablespoon of cornstarch: This gives the paint a smooth texture.
- 1 tablespoon of water: To mix and activate the cornstarch.
- 1 tablespoon of glycerin: This helps the paint glide on easily.
- Natural food colors: Experiment with different colors for fun!
Now, let’s break down the steps to create your colorful face paints:
Step-by-Step Instructions
- Combine Dry Ingredients: In a small bowl, mix the cornstarch with glycerin until well blended.
- Add Water: Gradually stir in the water, creating a smooth paste. If it appears too thick, simply add a bit more water.
- Divide and Color: Split the mixture into small containers or compartments of an ice cube tray. Add a few drops of natural food coloring to each compartment, mixing until you achieve the desired shades.
- Store Properly: Keep your face paints in airtight containers. They will last a week in the refrigerator. Ensure to let them warm up a bit before use, as this makes application easier.
If you want to take it a step further, experiment with adding natural ingredients like cocoa powder for brown hues or beet juice for a rosy tint. It’s an excellent way to teach kids about colors while fostering a love for creativity.
Final Tips
When applying these DIY face paints, remind your kids to avoid their eyes and mouth. A great tip is to use soft brushes or sponges to apply the paint for an even finish without the mess. Always perform a patch test on a small area of skin to ensure no allergic reactions occur, especially if you’re trying new colorants for the first time.
Creating face paints at home is more than just a fun activity; it’s a way to bond over creativity and exploration while keeping safety as a priority. Encourage your little ones to unleash their imaginations and enjoy every moment of their colorful adventures!
Fun and Easy Homemade Nail Polish Ideas

Creating your own nail polish at home can be a fun and creative activity for kids, allowing them to explore colors and express their personalities without the chemicals found in commercial products. Whether it’s for a special occasion or just an ordinary play day, homemade nail polish is safe and easy to make, and it provides plenty of opportunities for experimentation.
To start crafting your DIY nail polish, you’ll need a few simple and non-toxic ingredients. Here’s a quick list:
- Clear glue: This serves as the base, giving your polish a glossy finish.
- Food coloring: Natural food colors can be mixed to create vibrant hues.
- Cosmetic glitter or powdered mica: Perfect for adding some sparkle and shine.
Combine these ingredients with care to achieve the desired color and consistency. Here’s an easy method to follow:
Step-by-Step Instructions
- Mix the Base: In a small bowl, take about 2 tablespoons of clear glue.
- Add Color: Start with a few drops of food coloring, mixing it thoroughly until you reach the desired shade. Feel free to layer colors for a unique look!
- Incorporate Sparkle: Stir in a pinch of cosmetic glitter or powdered mica for that extra shine. This is where your polish can really stand out!
- Store Safely: Transfer the mixture into a small, clean container or an empty nail polish bottle using a funnel to avoid spills. Make sure to label it clearly.
When applying the homemade nail polish, remind your child to use a small amount on each nail to avoid smudging. Enjoy the process and encourage them to experiment with different colors and combinations!
Key Considerations
Ensure to conduct a patch test before full application, especially if using new ingredients. This step helps you catch any potential allergic reactions beforehand. Additionally, create a nail polish remover using simple solutions like vinegar and lemon juice if needed, making the whole experience even more manageable.
The joys of making and wearing customized nail polish are twofold: your child gets to express themselves through color and creativity while you can rest easy knowing that the ingredients are safe for play. So gather your supplies and let the fun begin, transforming ordinary afternoons into colorful adventures!
Crafting Natural Play Makeup for Sensitive Skin

Creating makeup for kids, especially for those with sensitive skin, is an incredible way to encourage creativity while ensuring safety. Sensitive skin can react to harsh chemicals often found in commercial products, making it essential to opt for natural and gentle DIY alternatives that are not only fun to make but also kind to delicate skin. This approach minimizes the risk of irritations and allergic reactions, allowing kids to enjoy their playtime without concerns.
To make natural play makeup, focus on using everyday kitchen ingredients that are safe and gentle on the skin. Here are a few ideas to get you started:
- Natural Face Paint: Combine cornstarch (1 tablespoon), cold cream (1 tablespoon), and food coloring to create a smooth, vibrant face paint. Start with a small amount of food coloring and mix until you achieve your desired hue, adjusting as necessary.
- Blush: For a healthy flush, finely grind some dried beetroot or hibiscus petals into a powder. Mix with a carrier like cornstarch to create a soft blush that applies easily.
- Lip Balm: Melt together 2 tablespoons of coconut oil and 1 tablespoon of beeswax in a double boiler. Once melted, add a drop of natural flavoring (like vanilla or strawberry) and a small amount of food coloring for a tinted lip balm that’s safe for kids.
When crafting these natural makeup products, remember to conduct patch tests on a small area of the skin to ensure no reactions occur. This is particularly important for kids with very sensitive skin. Utilizing natural ingredients not only offers peace of mind but also sparks opportunities for learning and experimenting together. Let your children mix colors and create their own unique shades-it’s an excellent way for them to express their creativity!
Always store these homemade cosmetics in clean, airtight containers to keep them fresh. Using small jars or tins is ideal, and placing them in a cool, dark area helps prolong their shelf life. By making cosmetics at home with safe ingredients, kids can enjoy the fun of makeup while allowing parents to feel good about what’s being put on their skin. Overall, it’s an engaging and educational activity that fosters creativity while prioritizing health and safety.
Tips for Storing and Preserving Your DIY Cosmetics
Storing homemade cosmetics properly is key to ensuring they stay fresh and safe for your little ones to use. Homemade play makeup, while free from harmful chemicals, can still be affected by exposure to air and moisture. To keep your creations in top shape, remember to always use clean, airtight containers. Small glass jars or tins are excellent choices as they can be easily sealed to keep out unwanted elements.
When it comes to temperature, location matters. Store your DIY cosmetics in a cool, dark place, away from direct sunlight or heat sources. For instance, a cupboard or a storage box would be ideal. Sunlight and heat can alter the consistency of the products, leading to spoilage or even changing the intended colors and scents over time.
In addition to proper storage, consider labeling your containers. Write down the date of creation on each container to track freshness. Most homemade cosmetics, depending on their ingredients, should ideally be used within 1 to 3 months. This way, you can ensure your kids are always safe while enjoying their creative makeup play. It’s also a good practice to routinely check the products for any changes in color, smell, or texture, as even homemade formulas can go bad.
Lastly, if you ever notice any signs of spoilage-such as an unusual odor or separation of ingredients-it’s best to discard the product to avoid any skin irritations. By following these simple tips, you can make the most out of your DIY cosmetics, keeping the fun alive in a safe way!
Engaging Kids in the DIY Makeup Process
Involving kids in the DIY makeup process can transform a simple craft activity into an empowering and educational experience. Not only do children love to create their own beauty products, but it also allows them to express themselves and learn valuable skills. Start by making it a fun and collaborative project-set aside a afternoon where your little ones can help design and create their cosmetics. This engagement can spark their creativity and encourage teamwork.
Allowing kids to choose their ingredients not only fosters decision-making skills but also teaches them to be conscious about what they put on their skin. For instance, you might provide them with a selection of safe ingredients like coconut oil, beeswax, and natural pigments such as beet juice or cocoa powder. Encourage them to experiment with mixing and matching different colors and textures to see what they can create. This hands-on approach helps them understand the properties of various ingredients while making the experience enjoyable.
Make the process even more relatable by involving storytelling. For example, ask your children to imagine they are creating makeup for their favorite characters or superheroes. This can motivate them to design specific products, like a sparkly lip balm or bold face paint, that reflects their imaginative scenarios. Additionally, emphasizing safety and the benefits of using natural ingredients during the crafting process helps instill an early appreciation for health-conscious choices.
Lastly, don’t forget to celebrate their creations! Once the DIY makeup is finished, host a mini fashion show or makeup parade where kids can show off their new products. This not only boosts their confidence but also reinforces the joy of creation. Remember, the goal is to inspire creativity and curiosity while ensuring they understand the importance of safe and natural ingredients. Engaging kids in this way makes learning about personal care and cosmetics an adventurous and fun-filled journey.
Essential Tools for Your DIY Makeup Station
Creating a dedicated DIY makeup station can be an exciting way for kids to unleash their creativity while ensuring a safe and enjoyable environment for crafting their own cosmetics. The right tools can make all the difference, providing not only functionality but also a sense of professionalism in their little beauty lab.
Start with a sturdy, flat workspace where kids can spread out their materials. A simple table or even a large tray can serve this purpose well, keeping everything organized and within reach. Storage containers are also essential-clear bins or jars can hold different ingredients like cocoa powder, coconut oil, and other safe materials. Labeling these containers helps kids identify ingredients easily, making them feel more in control of the process.
Next, gathering the right mixing tools is crucial. Consider including items such as small bowls or cups for mixing, spoons for stirring, and a spatula for blending ingredients. A kitchen whisk can be fun for blending liquids, too. Incorporating safety supplies, like gloves and aprons, not only keeps things tidy but also adds a layer of responsibility to the craft-teaching kids the importance of cleanliness and hygiene in any DIY project.
For color creation, a good set of measuring spoons is invaluable. They ensure accurate ingredient proportions while making it easier for kids to experiment with different shades. A small funnel can also assist when pouring mixtures into containers or bottles, minimizing mess and encouraging precision. Lastly, having a selection of empty cosmetic containers (such as small jars for lip balms or squeeze bottles for face paints) allows kids to showcase their creations beautifully.
By setting up a well-equipped DIY makeup station, you not only enhance the crafting experience but also instill valuable lessons in organization and creativity. Remember, the goal is to make this a playful, educational adventure that nurtures their imaginative spirit while keeping safety and fun at the forefront.
Creative Makeup Play Ideas for Kids
Creating your own play makeup can spark endless fun and creativity for kids, transforming ordinary materials into imaginative beauty products. Through various DIY projects, children can explore roles, emulate their favorite characters, or simply enjoy the art of makeup application in a safe and playful manner. Here are some engaging ideas to get them started:
One fantastic approach is to create themed makeup sets based on popular stories or shows. For instance, if your child loves a particular fairy tale, they can make fairy-inspired face paint using simple ingredients like cornstarch mixed with food coloring for vibrant, washable shades. Encourage them to think outside the box by using glitter, sparkles, or even petals as decorative elements to enhance their creations.
In addition, consider introducing a DIY makeup fashion show. Kids can prepare by crafting unique looks for each other using the homemade cosmetics. This helps them build confidence and showcases their creativity. Provide a “red carpet” area at home for them to strut their stuff and present their designs. Pairing this with a theme, like “Under the Sea” or “Superheroes,” can make the event even more exciting.
Another fun twist is to set up a face painting station. Kids can explore different characters, animals, or abstract designs by creating face paint from safe ingredients like yogurt mixed with food coloring. This not only allows for artistic expression but also provides an opportunity for sensory play. Make it a group activity – friends or siblings can work together, enhancing collaboration and social interaction.
Lastly, encourage role-play by letting kids craft their own makeup tutorials. They can film or record themselves applying their DIY cosmetics, explaining their techniques or the story behind their creative process. This not only enhances their communication skills but also lets them share their artistic designs with family and friends, fostering a sense of pride in their creations.
These creative makeup play ideas empower children to embrace their imagination and resourcefulness while enjoying the fun of beauty play in a safe environment. The adventures in DIY makeup offer much more than just play; they build memories that foster self-expression and creativity.
Safety Tips for Kids’ Makeup Playtime
When children dive into the world of DIY makeup, safety should always be the top priority. The excitement of crafting colorful lip balms or face paints can quickly turn to concern if the right precautions aren’t taken. Ensuring that the ingredients and the makeup playtime itself are safe allows kids to express their creativity without unnecessary risks.
First and foremost, choose ingredients wisely. Natural, food-grade components like coconut oil, shea butter, cornstarch, and food coloring are ideal for creating harmless cosmetics. These alternatives not only minimize the risk of allergic reactions but are also safe if ingested in small amounts-certainly a possibility during playtime. Always check for allergens by doing a patch test on a small area of the skin before any full application. This test guards against potential irritations, especially for sensitive skin types common in children.
Supervision is another essential element when it comes to makeup play. While it’s great to encourage independence, maintaining an adult presence can help ensure that things don’t get too messy or that small pieces aren’t mistakenly ingested. Create designated play areas with protective coverings on surfaces and attire, such as aprons, to help manage cleanup and keep the play safe and fun.
Moreover, establish rules for makeup use. Discuss with your children the importance of not applying products near their eyes or on broken skin to avoid irritations. This teaches them safe practices for makeup application, reinforcing the idea that while play is fun, safety matters most. Use this opportunity to also discuss hygiene practices, such as cleaning tools regularly and avoiding sharing cosmetics with others to reduce the risk of infections.
Remember, creating a joyful and imaginative space for kids to experiment with makeup is a primary goal. By focusing on safe practices, we can significantly enhance their experience, allowing them to indulge in their artistry while keeping health and well-being intact.
The Benefits of DIY Cosmetics for Children
DIY cosmetics offer children not just a fun activity but also numerous developmental benefits. Engaging in the creation of their own makeup provides a unique blend of creativity, learning, and self-expression. These experiences allow them to explore their identities, experiment with colors and textures, and develop fine motor skills as they mix and match ingredients.
One of the primary advantages of making their own cosmetics is the control it gives parents over the ingredients. By using natural and safe components, you can ensure that what kids are playing with is hypoallergenic and non-toxic. This aspect is critical, especially for children with sensitive skin or allergies. Utilizing simple ingredients such as coconut oil, shea butter, and food-grade colorants not only guarantees safety but also opens up discussions about the importance of knowing what goes on their skin.
Moreover, crafting DIY cosmetics can enhance children’s understanding of science and measurement. Recipes for lip balm or face paint can include steps that require measuring, mixing, and observing changes in texture and color. This hands-on experience makes learning tangible and fun, reinforcing math and science concepts in a way that feels seamless and enjoyable.
Finally, the act of crafting their own cosmetics fosters an appreciation for creativity and individual expression. Children can design their colors, flavors, and scents, which encourages them to embrace their uniqueness. This empowerment can boost their confidence as they take pride in their creations, transforming playtime into a positive reinforcement of their creativity and self-esteem. Ultimately, DIY cosmetics not only enrich the playing experience but also play a vital role in your child’s growth and learning journey.
Frequently Asked Questions About Kids’ DIY Makeup
Creating your own play cosmetics can seem daunting, but it opens up a world of fun and creativity for kids. As you embark on this journey of DIY makeup, several questions often arise regarding safety, ingredients, and techniques. Don’t worry-you’re not alone! Here’s a friendly guide to some of the most common inquiries parents have about kids’ DIY makeup.
For starters, what are the safest ingredients for making kids’ makeup? Always aim for natural and hypoallergenic materials. Common safe choices include coconut oil, beeswax, shea butter, and non-toxic food-grade colorants. These ingredients not only reduce the risk of allergic reactions but also provide a smooth and safe application experience for little ones. When selecting ingredients, consider any known allergies your child may have.
Another frequent question is, how can I ensure that the makeup is easy to remove? To achieve this, simply use a gentle mixture of coconut oil and castor oil as a makeup remover. This combo works wonders and is safe for kids’ sensitive skin. For a fun twist, make a game out of the removal process, encouraging kids to use cotton balls to see who can clean their ‘makeup’ off the fastest!
Many parents also wonder, what’s the best way to store homemade cosmetics? Keeping them in airtight containers or small jars is essential to maintain freshness. Label the jars with the ingredients and the date made, and aim to use the products within a couple of weeks. If you’re using perishable ingredients, consider placing them in the refrigerator to extend their shelf life.
Finally, a common concern is, how can I get my children fully engaged in the DIY process? One approach is to let them pick out their own colors and scents. Allowing them creative freedom not only keeps them engaged but also fosters their decision-making skills. Set aside a dedicated time each week for making new products, turning it into a fun ritual that everyone can look forward to.
Engaging in DIY makeup not only fuels creativity but also provides a wonderful opportunity for bonding. Encourage your kids as they express their individuality through their creations, and enjoy the playful process together!
Frequently asked questions
Q: What ingredients are safe for making fake makeup for kids?
A: Safe ingredients for DIY kids’ makeup include natural oils like coconut or olive oil, shea butter, cornstarch, food coloring, and aloe vera. These ingredients minimize skin irritation and are non-toxic. Always avoid synthetic fragrances and harmful chemicals. For detailed guidance, see our section on safe ingredients.
Q: How can I make homemade lip gloss for kids?
A: To make homemade lip gloss, melt together 2 tablespoons of coconut oil and 1 tablespoon of beeswax. Once melted, add a few drops of food coloring for tint and mix well. Pour into small containers and let it cool. This simple recipe is safe for kids and easy to make.
Q: What can I use instead of food coloring for kids’ makeup?
A: Instead of food coloring, you can use alternative natural dyes such as beet juice for pink, turmeric for yellow, or spirulina for green. These natural pigments provide a fun, vibrant color while remaining safe for skin application.
Q: Is it safe for children to use DIY face paint?
A: Yes, DIY face paint can be safe for children if made from non-toxic and skin-friendly ingredients like cornstarch, coconut oil, and natural colorants. Always perform a patch test on a small area of skin to check for allergies or sensitivities before extensive use.
Q: How can I teach my child to make their own play cosmetics?
A: Engage your child by starting with simple recipes, like lip balm or face paint. Gather safe ingredients and tools from your DIY makeup station. Encourage creativity by allowing them to choose colors and scents. This process is not just fun but also educational.
Q: What precautions should I take when kids play with makeup?
A: Always supervise kids during playtime makeup activities. Ensure they use non-toxic ingredients and avoid applying anything near their eyes or mouth. Establish a cleanup routine afterward to prevent any mess, and remind them this is just for fun, not actual use.
Q: Can I store homemade cosmetics, and for how long?
A: Yes, homemade cosmetics can be stored in airtight containers, ideally in a cool, dark place. Most DIY cosmetics last about 4-6 weeks. Ensure they are properly sealed to maintain freshness and avoid contamination.
Q: Why should we choose DIY cosmetics over store-bought ones?
A: DIY cosmetics allow control over ingredients, ensuring they are safe, hypoallergenic, and devoid of harsh chemicals. Making cosmetics at home fosters creativity and provides your child with a valuable and fun learning experience about ethics and sustainability in beauty.
Key Takeaways
Now that you know how to create safe and fun DIY play cosmetics for kids, it’s time to unleash your creativity! This project not only encourages imaginative play but is also a fantastic way to bond with your little ones. Remember, you can adjust colors and textures to make these cosmetics truly unique. If you have any questions or need support, don’t hesitate to reach out in the comments below-we love hearing from you!
For more DIY projects, check out our guides on other kid-friendly crafts or explore our ideas for easy home improvement initiatives. And don’t forget to sign up for our newsletter for the latest tips and tricks delivered straight to your inbox. Your next creative adventure starts now-get crafting!